
Installing an SSD or any other SATA-3 storage drive is pretty easy in HP Pavilion G6 series laptops. Unlike other types of laptops, the hard disk can be replaced or removed without having to open the whole bottom panel.
Most of the G6 laptops like 2032TX and 2100 Notebooks can support SATA 2.5″ SSD. The process will be very easy to follow as compared to the latest HP laptops.
In this article, I will tell you about the whole installation process step by step. Also, by the end of this article, we will clone the OS from your old HDD to the new SSD in your G6. However, you can install the new OS once the setup is finished.
But, before diving in to the actual installation process, I have another thing to discuss with you.
Which SSD you can install on your HP Pavilion G6 laptop?
The pavilion G6 is an old series. I still see some G6 models from 2011 and 2010 as well. So, if you want, you can increase your G6’s performance with an SSD upgrade. Now, I must tell you that the G6 laptops can only support the SATA-3 SSDs (maximum). No M.2 SATA or M.2 NVMe slot will be vacant on the motherboard for M.2 SSD installation.
So, you can buy a new SATA SSD or install any other if you have one with you. But, do not invest in an M.2 because it won’t fit inside it.
If you want to get more information on all the supported hardware components, you can see the user manual of HP G6. Now, let’s jump into the actual process.
Best SATA 2.5″ SSDs for HP Pavillion G6 Laptop
| Image | Model | Features and Specs | Price |
|---|---|---|---|
 | Samsung 870 Evo | Capacity: 250GB – 4TB Interface: SATA Speed: 550/510 MB/s Endurance: 2,400 TBW | Check Price |
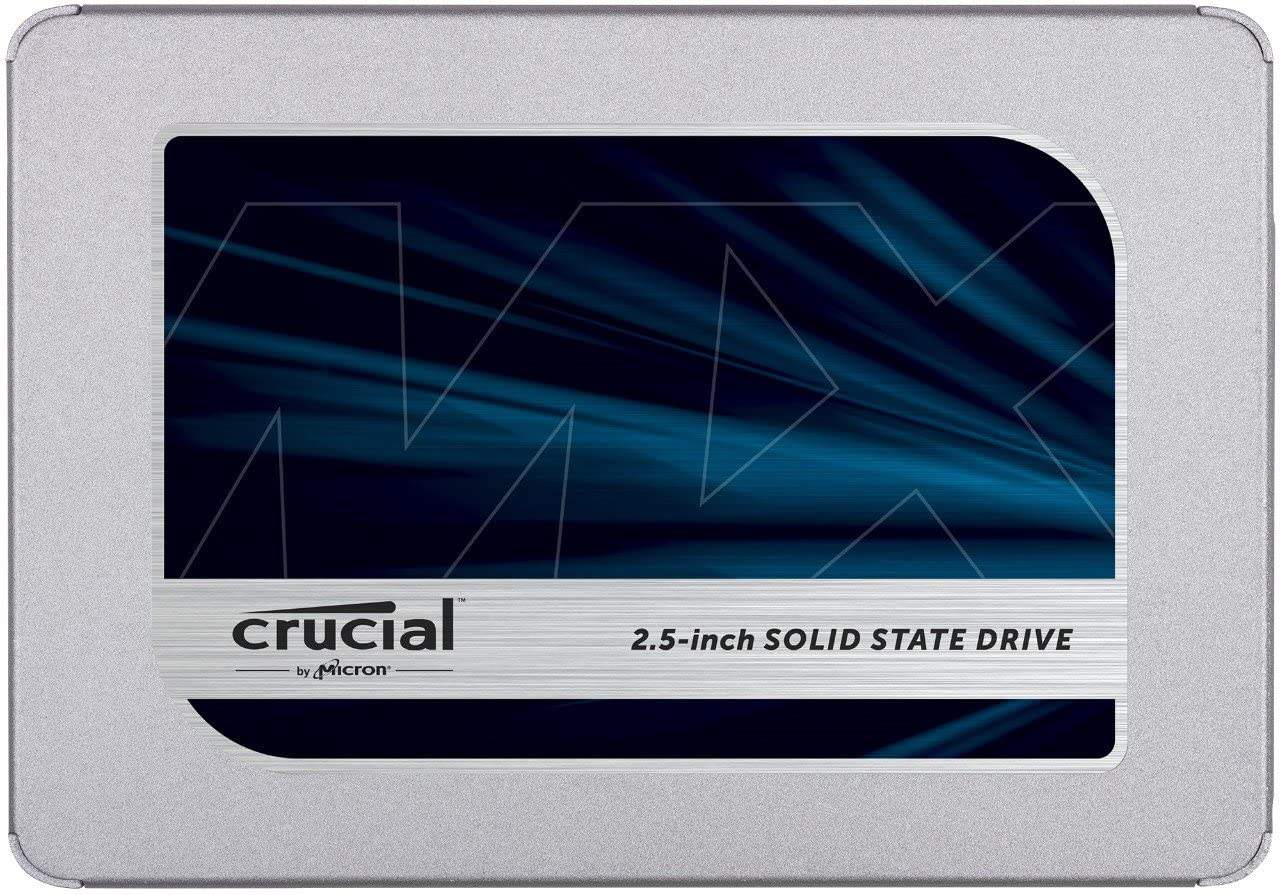 | Crucial MX500 | Capacity: 250GB – 4TB Interface: SATA Speed: 560/530 MB/s Endurance: Up to 700 TBW | Check Price |
Steps to install the SSD in HP Pavilion G6
Note: Make sure to follow the steps systematically till the end for the best results.
1. Have a data backup
Before proceeding further, I would strongly recommend your having a data backup of your hard disk. There are very few chances of losing data in this process but still, it’s good to use good software for data backup or do it manually.
2. Prepare tools and turn off your laptop
The back cover will be tightened using the 63 screws. So, you must have Philips P0 and P1 screwdrivers with you. It will be good if you have a complete laptop screwdriver kit with you.
Along with this, make sure to place your laptop on a flat surface. It will be good if you make yourself free from any static energy before starting the installation process. For that, touch any metallic surface.
Once everything is done, just remove all the cords including the power cable from the laptop. Now, the next step will be to remove the battery. Once you removed it, press and hold the power button for seconds so that any residual power gets purged.
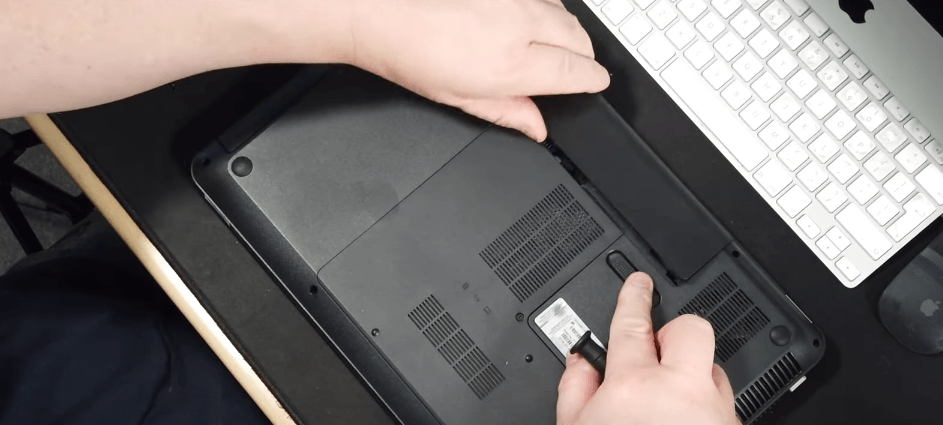
3. Open the Back Panel
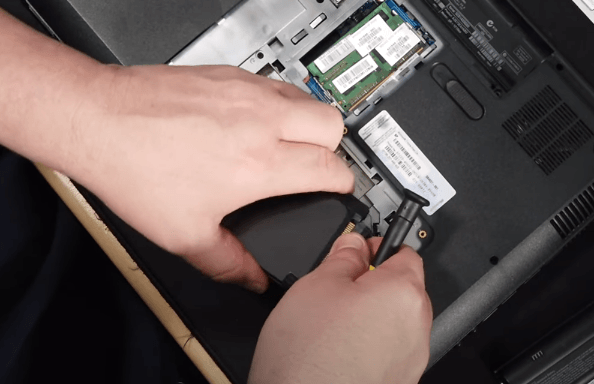
Grab your screwdriver and start opening the screws given on the back panel. See the image below for a better understanding. You will have to slide the L-shaped cover to the downside so that it can be free from the locks.
Once the panel is opened, you will see three different ports and hardware components. The first one will be the network card, the second one will be the RAM, and finally the biggest component will be your hard drive. We are going to replace it with the SSD.
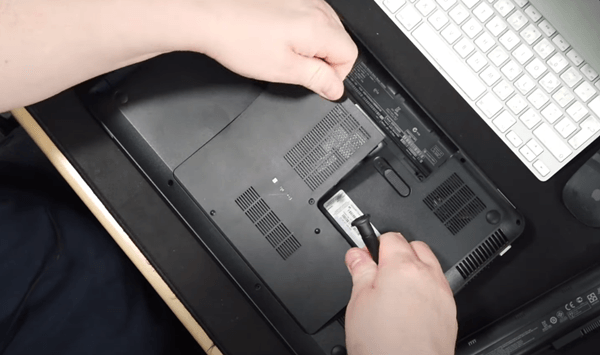
4. Disconnect and remove the hard drive
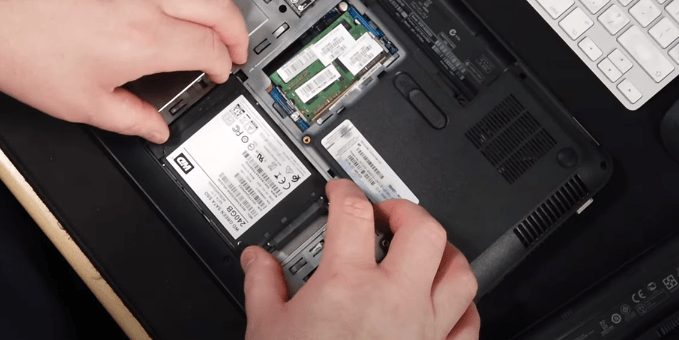
Just push the hard disk forward (from the opposite direction of its connection) and grab it up. It will come out as it is. Now, remove the SATA cable from the drive gently.
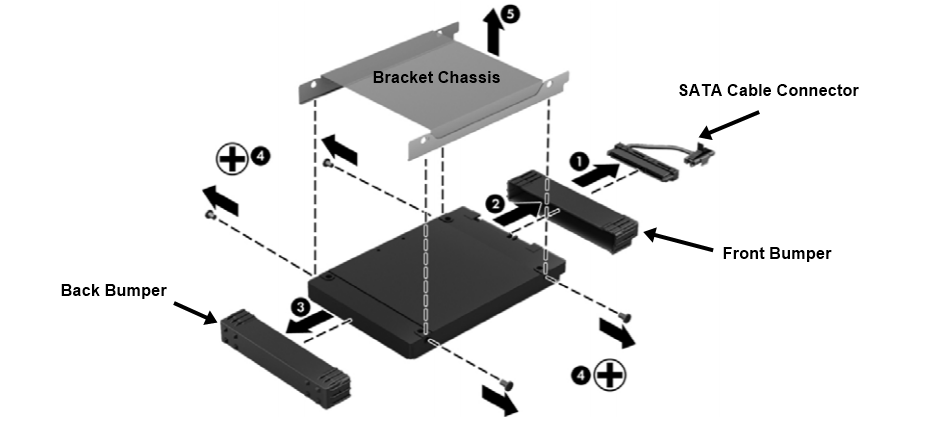
After that, you will have to remove the front and back bumpers from your drive as shown in the image. After that, remove the 4 PM 3.0×3.5 screws from the sides. This will free your hard drive from its bracket chassis.
5. Connect and install the SSD
Now, grab your brackets and the SSD and tighten it through the screw holes with the same screws you just removed. Once the chassis is ready, install both bumpers to your SSD body. Now, connect the SATA cable to your SSD just like it was connected to the HDD.
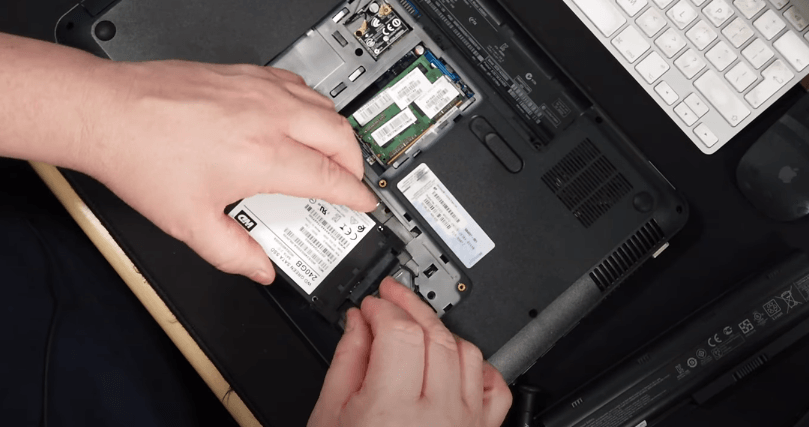
Fit it inside the same hard disk cavity and you are done. Reverse the same procedure so that the back panel is fit exactly it was there before the opening.
How to clone your existing OS to the newly installed SSD in HP Pavilion G6 Laptop?
I have discussed the same thing in various other articles on this blog. But, I am going to help you with the same again this one as well. So, let’s start.
Note: If you have an original Windows Installation media with you, just install Windows from start for the best results. But, if you want to keep things as it is, just follow the procedure below.
1. Boot your system from hard drive externally
Because your laptop has only one hard drive port, the only way to grab all the OS data is by using the USB port. So, for that, you will need an SATA to USB cord. Just connect its SATA side to your hard drive and the USB side to your laptop’s USB port (Preferably USB 3.0 or any latest).
Now, once the hard drive is connected to the system and the SSD is also inside the laptop, we can start the process. So, the first step will be to enter the BIOS and boot your system from the hard drive once again.
Just press the ESC button while your system is booting up and you will enter the BIOS. Go to the system configuration menu and enable the Legacy Support On. Now, go the BOOT settings and make sure the boot priority is set to the hard drive connected through the USB. Just save the settings and exit.
2. Mount the SSD (If Required)
If your system has recognized the newly installed SSD, just skip this step and go to the next one. But, if not, make sure to mount it first,
In Windows systems, it is required to mount your new drive and create its partitions if you want. Without mounting the new drive, your system will not recognize it for anything.
So, just follow this process to mount your SSD.
- Press Windows key+R to open the Run dialog
- Inside Run, type diskmgmt.msc and hit Enter
- Now, right-click on your SSD (Unallocated) and hit New Simple Volume or Initialize Disk

- Now, you can make partitions if you want, otherwise, just proceed with Yes for all the dialog boxes.
3. Install the Macrium Reflect Software and clone your OS
Go to this link and install the Free Macrium Reflect Software which will help you clone all your OS and other data to your new drive. Once the software is fired, you will see your OS drive and the SSD drive below it. Make sure to check the box given with the source disk.
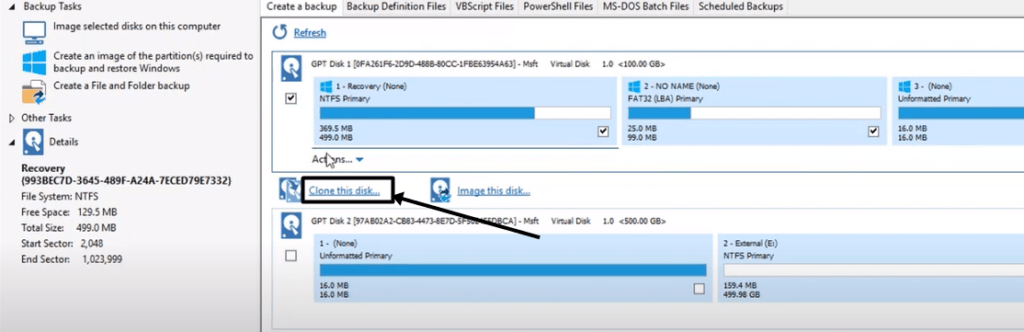
Just press Clone this disk and in the next dialog, select your SSD where you see select a disk to clone to.
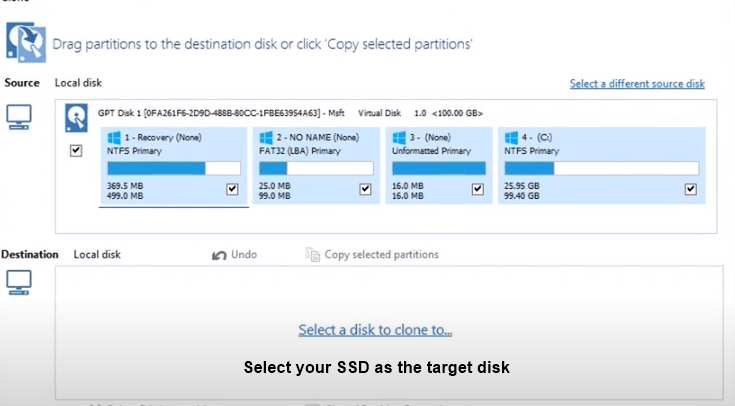
Now, if you want to clone the entire disk, just click copy selected partitions. If you just want to move the OS, drag and drop the volumes which have the Windows icon with them.
Click Finish and wait for the cloning process to finish. See this video for a better understanding.
4. Change the Boot priority again to your SSD
Once the cloning is finished, your SSD is ready to be used as your OS and storage drive. In fact, both of your drives have OS files and you can use anyone to boot your system from. But, you will now have to enter your BIOS again and change your boot priority to the SSD and that’s it.
If you are confused with the BIOS, just watch a YouTube video like this and you will have everything cleared.
How to do a clean Windows Install in your new SSD?
Below is the process of installing and activating the new Windows in your HP Pavilion G6 Laptop.
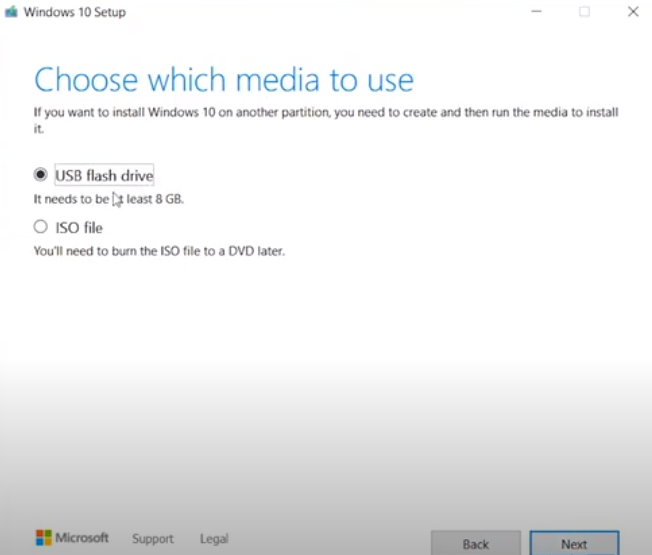
1. Create Windows Media Creation tool
For this process, you will need a pen drive/DVD in which you can make your bootable media drive. Consider having 8GB space at least in your DVD/pen drive. Make sure to format this drive before using it.

Download Windows Media Creation Tool for the Windows version of your interest. The tool is available for Windows 7, 8.1. and 10.
2. Install the Media creation tool on your pen drive/DVD
Once the download is finished, open this tool. Choose the option Create installation media for another PC. Choose the pen drive as your destination drive and let the Windows get downloaded inside it.
3. Enter the BIOS/UEFI and change boot device
Now, enter the BIOS/UEFI and disable Fast Boot and Secure Boot options. Just press F2 multiple times while the system is starting up and you will enter the UEFI.
- Go to the Advance Mode (F7) and go to the Boot tab. Now disable the Fast boot option.
2. Now, go to the Security tab and disable the secure boot Control option.
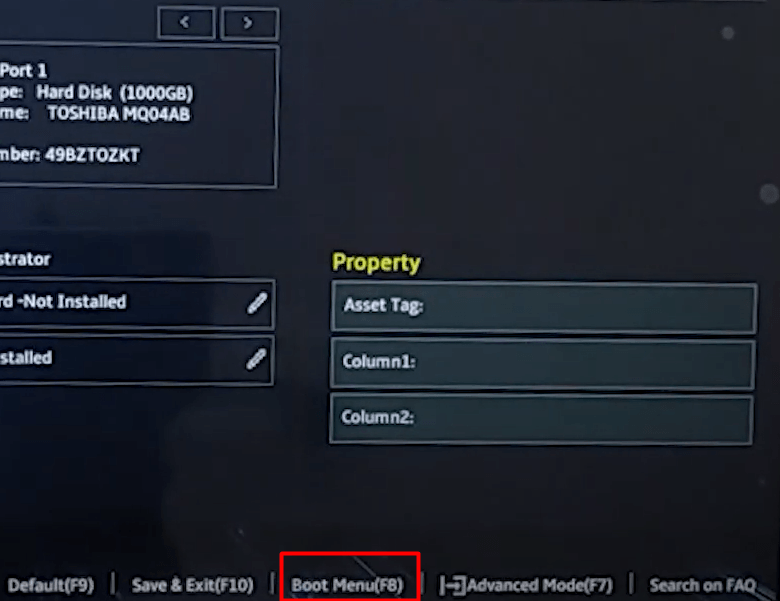
3. Lastly, in order to load your system from the pen drive, go to Boot Menu and select your pen drive or DVD where the Windows is downloaded.
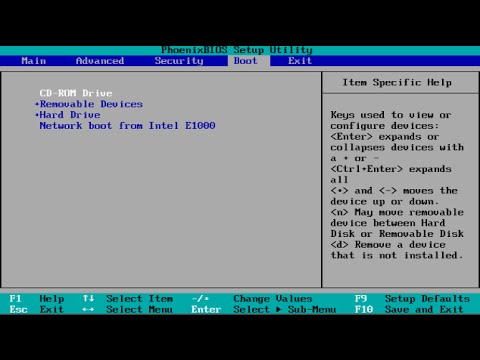
If your laptop is opening with a normal BIOS menu, go to the Boot tab and move the pen drive/DVD to the top to make it your boot drive. See the image below
4. Install and activate the Windows
The Windows Setup will start.
When you reach the menu, Where do you want to install Windows?, just choose your SSD and press Next. (You will probably see unallocated with your SSD). Do drive partitions if required. If not, you can go further, and then the Windows will get installed. Once the installation is finished, you can remove your bootable DVD or Pen Drive.
If you have an activation key, just follow this procedure and activate the Windows.
- Go to Windows Control Panel.
- Click on System and security. Then select System.
- Click “Get more features with a new edition of Windows”.
- Select “I already have a product key”.
- Then enter your product key and click on Next.
For more information on Windows activation, visit this page.
Final Verdict
I hope you were able to replace your HDD with a fast SSD in your HP Pavilion G6 laptop. If you have any other questions in mind, just get in touch with me.
Thanks for reading.