
Finally, got an M.2 SSD for your ASUS TUF Gaming A15 Laptop? Cheers on that! Eager to install new games? I do understand the greed. In this article, I have stated relevant steps to “Install SSD in ASUS TUF Gaming A15 Laptop”
Upgrading the impressive gaming laptop with M.2 Solid-State Drive is a pretty simple task. Investing a few minutes, and reading the whole article will help you to get the job done. No need to visit experts, or pay their fees to add an additional SSD to the ASUS TUF Gaming A15 Laptop.
Simply, follow the stated steps to complete the installation process. If you do not know which SSD to buy for this laptop, you can read this SSD Buyer’s Guide.
Can you install M.2 PCIe NVME SSD in Asus Tuf Gaming A15 Laptop?
Yes, the motherboard in the Asus Tuf Gaming A15 laptop has a free M.2 NVMe PCIe slot with PCIe Gen 3 support.
In all the Asus Tuf Gaming A15 laptop models, you will see another M.2 NVMe PCIe port which will be occupied by an SSD already.
The dedicated M.2 PCIe NVMe slot will have PCIe x4 lanes allocated to it. So, you can have a maximum read/write speed of 3GB/s with the help of an NVMe SSD.
However, the same slots can also be used to install an M.2 SATA SSD. This SSD can never go beyond the read/write speed of 600MB/s. So, it is up to you which one you want to go with. But, the laptop is suitable to be used with a faster NVMe and the normal M.2 SATA SSD as well.
Steps to install SSD in ASUS TUF Gaming A15 Laptop
Wait, before heading into the process of installation, make sure you have a compatible screwdriver. In case, you don’t have a compatible screwdriver kindly, get it from Amazon. It’s like a one-time minimal investment, you can make use of the Tool Kit for multiple purposes.
Check Mini Screw Driver Kit on Amazon.
Step 1: Open the bottom panel screws
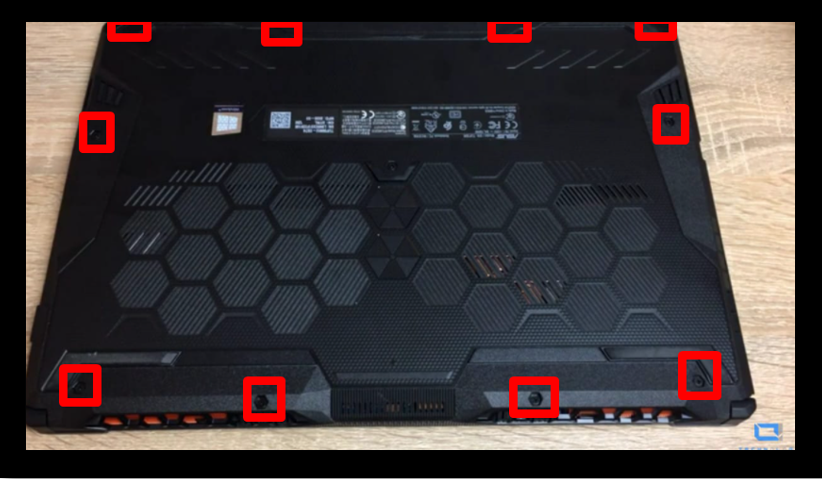
Once, you get a compatible screwdriver, gently flip your ASUS TUF Gaming A15 Laptop and unscrew all the screws. Have a look at the above image, you will find 10 Screws. Make sure you remove each of them, before pulling off the back panel. Smoothly, try to remove the bottom cover of the ASUS TUF Gaming A15 Laptop.
Step 2: Locate the M.2 SSD Slot

Now, using a soft brush clean the dust particles. You will find the M.2 SSD connecting slot, have a look at the above image for better understanding.
Note: Do not mislead any of the connecting cables or tiny wires to avoid unwanted hassle.
Step 3: Open the M.2 SSD tightening Screw
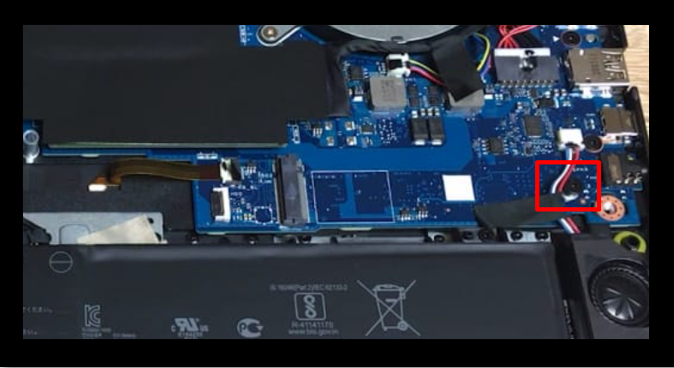
Have, a look at the above image. You will find a screw, and smoothly remove it using a compatible screwdriver. Place the screw in a proper place “Do not mislead it other screws”
Step 4: Fit in your M.2 SSD

Now, Insert M.2 SSD in the given Solid-State Drive slot. Gently, push-in the M.2 Solid State Drive to set it properly. Before, implementing the stated steps have a proper understanding. No need to hurry up, it’ll hardly take 5-10 minutes to get the job done.
Step 5: Push the SSD to its place

Delicately, press the M.2 Solid-State Drive to set it properly.
Step 6: Tighten the SSD screw

Now, insert the appropriate screw to tighten the additional Solid-State Drive in your ASUS TUF Gaming A15 Laptop.
Step 7: Place the bottom panel back and tighten the screws

Once done, put back the laptop bottom cover. Now, you have to tighten the back panel of the ASUS TUF Gaming A15 Laptop with 10 Screws.
Step 8: Mount your SSD
In the Windows OS, the newly installed storage drive will not appear until you create a new volume and mount the drive to the motherboard. However, doing this is very easy. Just follow the process given below.
- Press Windows key + R together to open the Run dialog
- Enter diskmgmt.msc and hit enter
- Inside the disk management menu, locate your newly installed SSD
- It will have unallocated mentioned with it.
- Just right-click this drive and click New Simple Volume

6. Proceed further and create partitions if you want. Otherwise, just go ahead and your SSD will be ready to use.
That’s it! You have completed the installation process of a new SSD in ASUS TUF Gaming A15 Laptop.
How to do a clean Windows Install in your new SSD?
Below is the process of installing and activating the new Windows in your Asus Gaming Tuf A15 laptop.
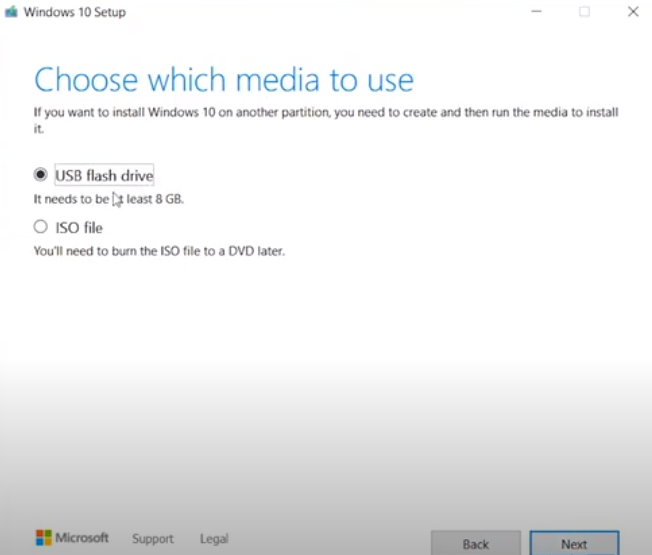
1. Create a Windows Media Creation tool
For this process, you will need a pen drive/DVD in which you can make your bootable media drive. Consider having 8GB of space at least in your DVD/pen drive. Make sure to format this drive before using it.

Download Windows Media Creation Tool for the Windows version of your interest. The tool is available for Windows 7, 8.1. and 10.
2. Install the Media creation tool on your pen drive/DVD
Once the download is finished, open this tool. Choose the option Create installation media for another PC. Choose the pen drive as your destination drive and let the Windows get downloaded inside it.
3. Enter the BIOS/UEFI and change boot device
Now, enter the BIOS/UEFI and disable Fast Boot and Secure Boot options. Just press F2 multiple times while the system is starting up and you will enter the UEFI.
- Go to the Advance Mode (F7) and go to the Boot tab. Now disable the Fast boot option.
2. Now, go to the Security tab and disable the secure boot Control option.
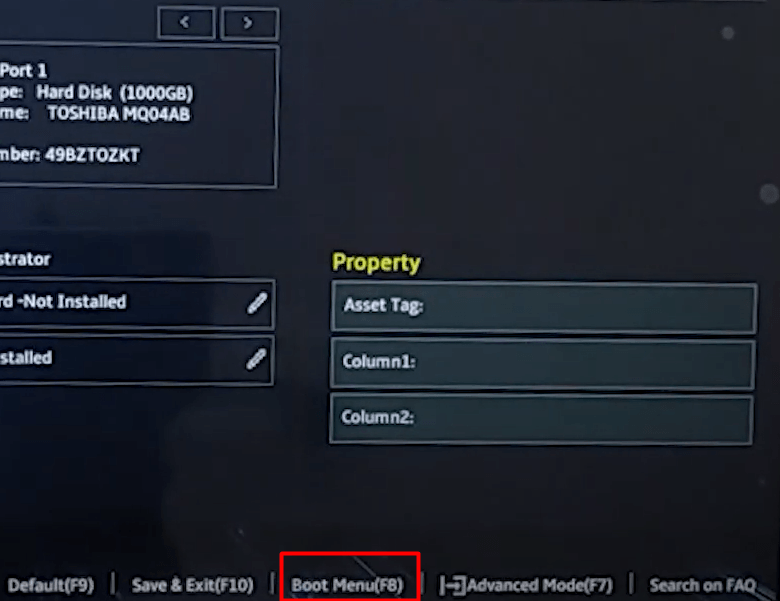
3. Lastly, in order to load your system from the pen drive, go to Boot Menu and select your pen drive or DVD where the Windows is downloaded.
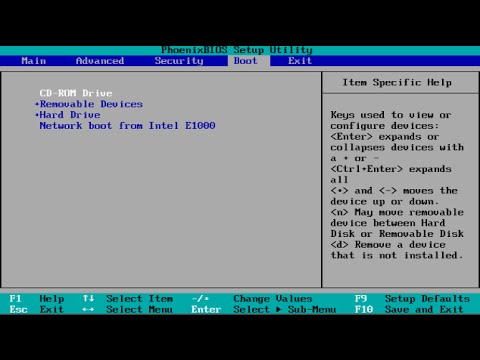
If your laptop is opening with a normal BIOS menu, go to the Boot tab and move the pen drive/DVD to the top to make it your boot drive. See the image below
4. Install and activate the Windows
The Windows Setup will start.
When you reach the menu, Where do you want to install Windows?, just choose your SSD and press Next. (You will probably see unallocated with your SSD). Do drive partitions if required. If not, you can go further, and then the Windows will get installed. Once the installation is finished, you can remove your bootable DVD or Pen Drive.
If you have an activation key, just follow this procedure and activate the Windows.
- Go to Windows Control Panel.
- Click on System and security. Then select System.
- Click “Get more features with a new edition of Windows”.
- Select “I already have a product key”.
- Then enter your product key and click on Next.
For more information on Windows activation, visit this page.
Conclusion
In this, article I have discussed the relevant steps to install SSD in ASUS TUF Gaming A15 Laptop. If you are not confident opening your laptop, just don’t do it. Find an expert nearby who can do it for you. If your laptop is under warranty, do not open it on your own, the warranty may void. If you have, any queries or doubts related to the topic kindly, note them in the given comment section. I’ll look into it.
Thanks for reading!
Hey man, nice article! Thanks for the help! Do you think a WD Black™ SN850 SSD with heatsink would also fit in this slot? The space might be to tight, as the SSD is 8.8mm thick..
If your motherboard’s M.2 slot has a heatsink already, you don’t have to use it. Otherwise, the SSD will get fit on any M.2 slot pretty easily.
The FA506II (R5, 1650ti) model doesn’t have the extra slot.
If you have checked the motherboard and no free slot is available, then there is nothing you could do. I would recommend getting in touch with Asus Support. Thanks
Also, the upgrade manual says a M.2 SATA won’t fit.
Hi i recently purchased an a15 and i want to buy 980pro with heatsink but i don’t know if it will fit. Can you help me please?
No, your laptop will not allow any SSD with a heatsink. You will have to install it as it is.
Hi! need some help. I have and a15 FA506QM 2021 and I want to add a firecuda 510 PCIe 3gen 2TB. Could there be any compatibility problems? Thanks!
Yes, you can do that. Your motherboard and BIOS support that. However, it is always a good idea to talk to your manufacturer before making the purchase.