
The limited storage capacity in Macbooks is not a new problem. Especially if you are using some older versions, you generally get either 128 or 256GB storage options. The same case is here with the Macbook Air 13″ 2017 model. This laptop is now discontinued but when it was available, you just had two storage variants to choose from.
- 128GB PCIe-based SSD (NVMe)
Configurable to 256GB or 512GB SSD - 256GB PCIe-based SSD (NVMe)
Configurable to 512GB SSD
So, if you are using this laptop and looking to upgrade the storage space, you are left with only two options. If you are using the 128GB variant, you can either upgrade with a 256GB or a 512GB SSD. In simple words, you can’t install any internal M.2 NVMe SSD with more than 512GB of space inside your MacBook Air 2017.
Now, the next problem arises with the form factor. If you are a little bit aware of the M.2 Form Factor, it is a small-sized arrangement to install the Solid State Drives. You can know more about M.2 here.
Apple has its own M.2 SSD design with a different connector type. You can’t install any other normal 2280 M.2 NVMe SSD inside a Macbook because they are physically incompatible. However, because they are using the same PCIe Interface and NVMe protocol, you can use an adapter to get your normal SSD installed on your Macbook. If you don’t want to open your MacBook air, you can go with a good M.2 SSD enclosure. We are going to get to that later in this article. Now, just start with the installation process.
Note: Opening your laptop may void its warranty. Also, any physical damage to the internal components may result in serious problems as well. So, take special care while performing these actions.
Tools Required
- Screwdriver (Pentalobe P5 1.2mm/PH #00)
- Screwdriver (Torx T5)
- Anti-static wrist strap (Not Mandatory)
- External Drive for backup (Timemachine)
Steps to upgrade/install SSD in Macbook Air 13″ 2017?
Replacing the SSD on a Macbook Air 13″ 2017 is surprisingly easy as compared to other laptops. It is a matter of a maximum of five minutes. So, let’s get started. Make sure to back up your data before proceeding.
Step 1: Backup your MacOS
You can either back up your Mac OS and files on Cloud or on an external drive as well. External backup is simple but cloud backup is more secure. Because, we are going to completely replace the existing drive, the data should be stored somewhere so that we can extract it back.
So, here is the process of backing up your Mac on Time Machine (External Drive) and this is the process of iCloud backup.
Once the backup is complete, you can replace the SSD, and then we will grab all that data and store it on our new drive. You can also choose to do a clean upgrade with a new installation. For that, you will need to create a bootable drive and its complete process is given here.
Step 2: Disconnect the power cord if connected and turn your laptop over
Make sure the charging cable is disconnected. Now, make sure to turn your laptop upside down on a soft surface. You can use soft plastic or a piece of cloth. This is to avoid scratches on its main site.
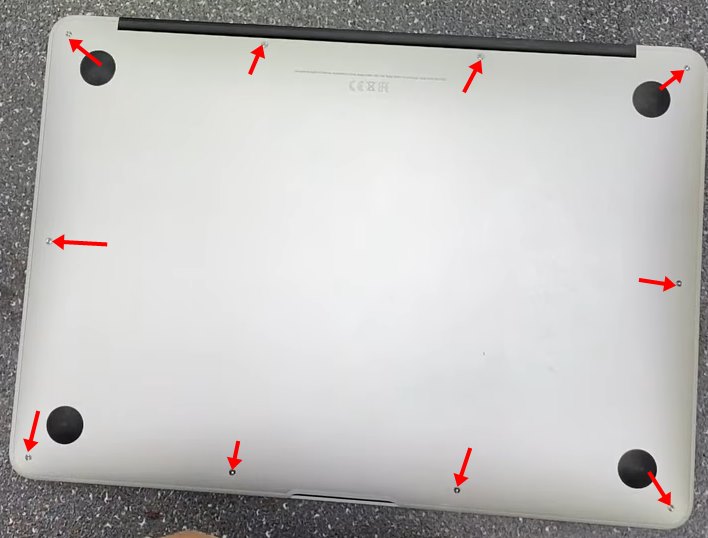
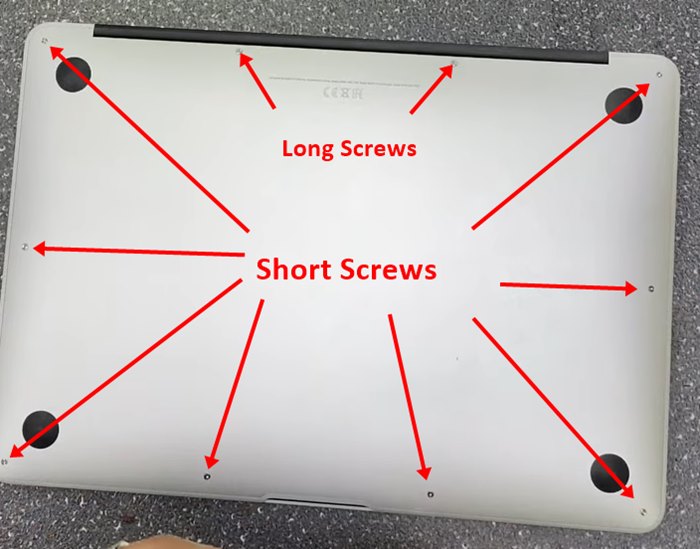
Step 3: Open 10 Screws on the bottom
All these screw heads are the same and can be opened with a Pentalobe P5 1.2mm screwdriver. If you do not have a compatible screwdriver, you can try with another cross-head PH #00 screwdriver. But, make sure to never force it. Rushing on the screws can result in damage to the head. So, try to use a compatible screwdriver. If you don’t have one, you can order online easily. Two long screws and eight small screws will be there on the bottom. You can see their locations.
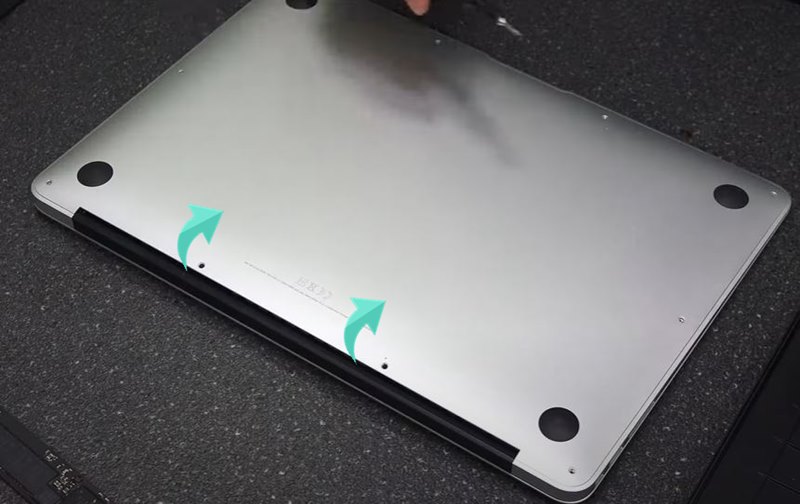
Step 4: Take the bottom panel out
You might be feared about this step. But, opening the bottom cover is very easy once you have opened all the screws. You just have to insert your finger inside the top display panel cavity. Then gently take the cover out and it will be removed without requiring much effort.
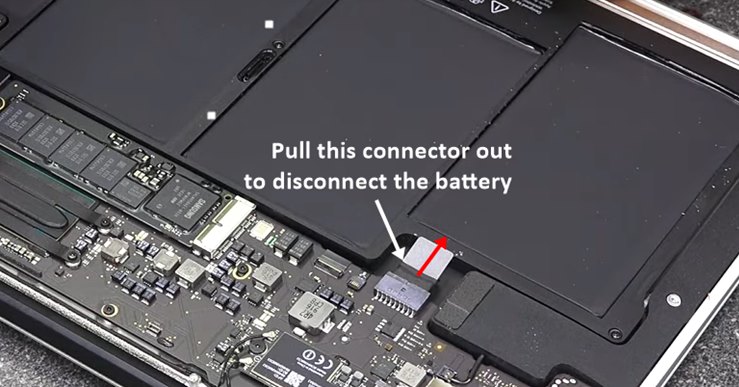
Step 5: Unplug the Battery
Although your laptop is working with an internal battery, it is possible to disconnect it from the board. It is not mandatory but you should definitely do it for safety purposes. You just have to take that connector out from the battery port.
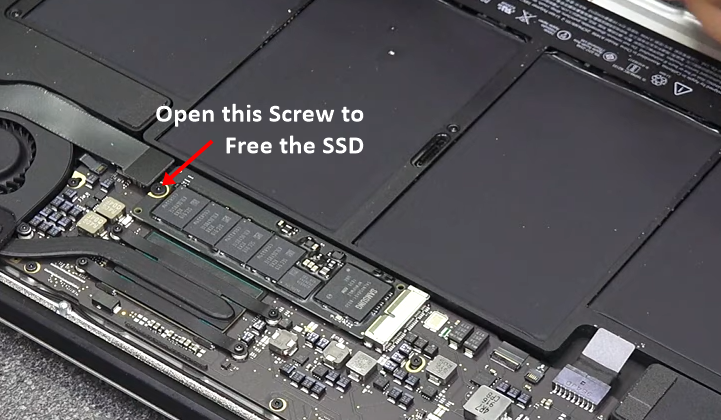
Step 6: Open the M.2 screw and take the existing SSD out
Now, you will need your second screwdriver i.e. Torx T5. You can see a small screw holding your existing SSD in its place. One side will be the M.2 port and this screw on the second end. Just open that small screw with your screwdriver. You can now take your SSD out from the port. Make sure to pull it from the port at the same angle. Do not try to grab it to the top directly.
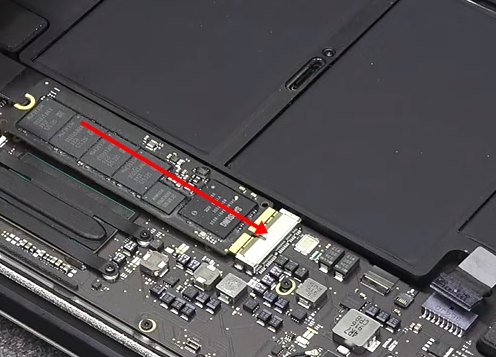
Step 7: Install your new SSD
Take your new SSD and insert it inside the M.2 port at an angle and push gently inside the port. It should get to its place and then you just have to tighten that M.2 screw back on its place. The SSD should again come under the screw.
Step 8: Reconnect the battery and close the bottom cover
Now, in the same, you disconnected the battery, and re-install it by inserting the connector inside the port. Then, place the bottom cover in its place and tighten all the screws that their place. If you have forgotten the location of these 8 small and 2 long screws, you can see the image below.
Step 9: Restore your Mac from the backup
- Connect your external Time Machine drive where the backup is stored (ignore in the case of iCloud backup)
- Now, start your Mac and press Command+R key while the booting process
- Now, you will enter the backup menu and be asked to log in
- You can then choose the Time machine recovery option
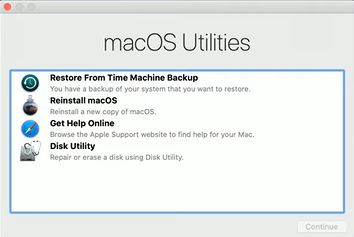
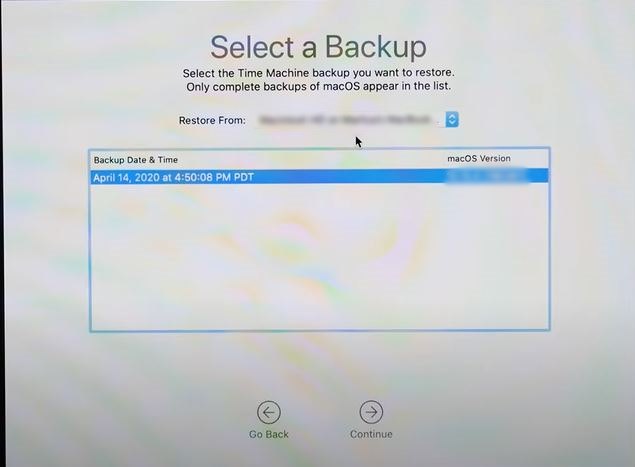
- In the next menu, choose your backup drive and then click Continue. If you have an iCloud backup, you will see its name as well.
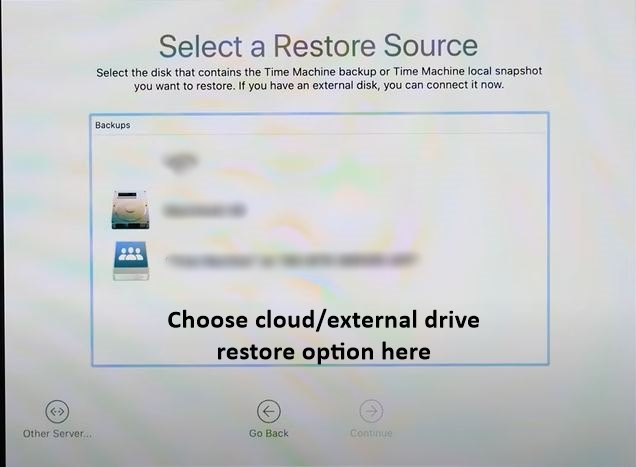
- If you have multiple backup points, choose the latest one or the one that you want to restore.
- The next step is to choose your new drive for the backup and then proceed further with the restoration process.
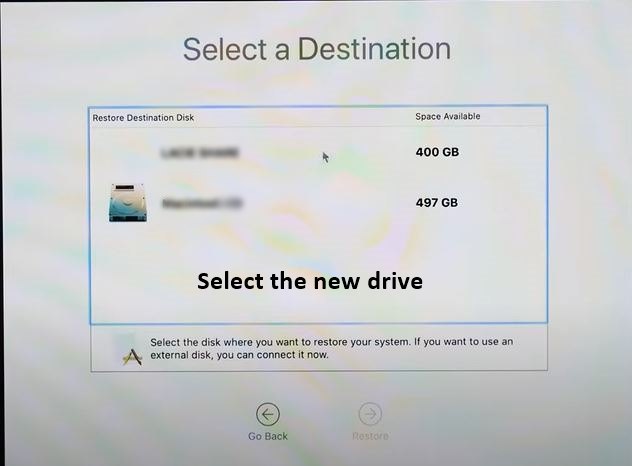
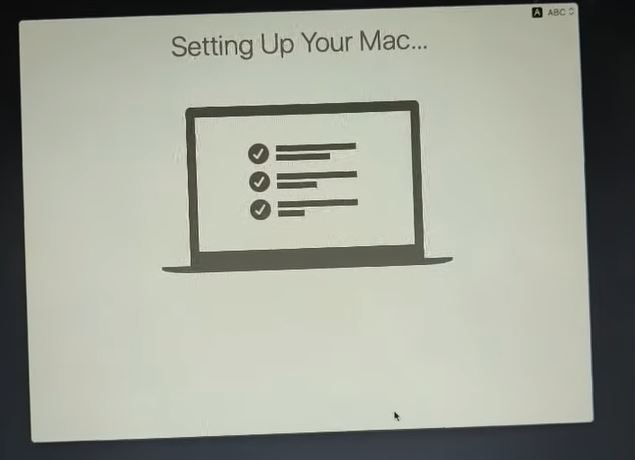
You will be asked to erase the drive which you can surely do because the new drive is already empty. Then, you will have to wait for some time for this restoration process. The total restoration time will depend on the total size of your backup.
Best SSD for Macbook Air 2017
Because Apple has its own form factor for M.2 SSDs, it is not easy to find these special SSDs in the markets. But, there are some SSDs that you can trust and install on your laptop. Let’s have a look at these.
| Image | Model | Features and Specs | Price |
|---|---|---|---|
 | OWC Aura Pro X2 | Capacity: 240GB/480GB Interface: PCIe 3.0 Speed: 3200/2400 MB/s 5 Years Limited Warranty | Check Price! |
 | Timetec 512GB MAC SSD | Capacity: 512GB Interface: PCIe 3.0 Speed: 2000/1500 MB/s 3 Years Limited Warranty | Check Price! |
 | Cloudeck NVMe SSD 512GB | Capacity: 512GB Interface: PCIe 3.0 Speed: 1800/1400 MB/s 1 Year Warranty | Check Price |
Can you install any M.2 NVMe SSD in Macbook Air 2017?
We discussed earlier that Apple SSDs are using a different form factor. So, the key location is different from the ordinary SSDs in this case. But, because the interface is the same, we can make use of an external adapter to connect any M.2 NVMe SSD to our Macbook Air laptop. Below is a device that you can purchase for this task.

This M.2 NGFF M-Key SSD Convert Card will go directly inside the M.2 port on your Macbook Air. Then you can use the normal M.2 NVMe port mounted on its top. You can easily connect any M.2 NVMe SSD there pretty easily. The speed will remain the same. Just make sure that you are installing a PCIe 3.0 NVMe SSD.
Thanks for reading!