
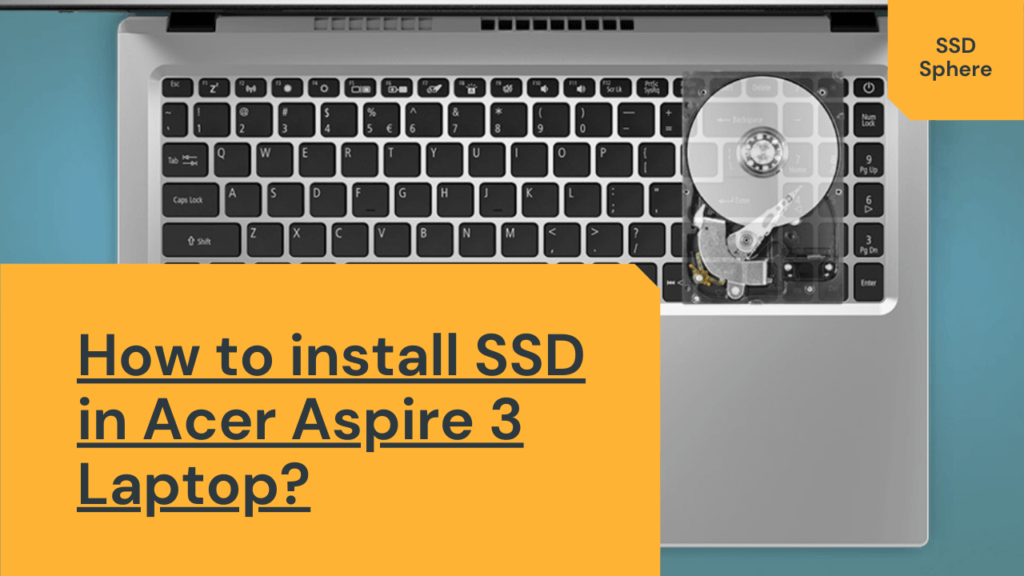
Bought a compatible SSD for your Acer Aspire A3 laptop? Intending to upgrade and install the same? Well, that’s a good decision. In this article, I have introduced the necessary steps to install SSD in Acer Aspire 3 or A3 series Laptop. Investing a few minutes, reading the article will help you to get the job done.
You can implement the stated steps to “Install SSD in Acer Aspire A3 Laptops” with different models such as Acer Aspire A314-22, A315-41, A315-53G, A315-55G, A315-56G, and so on…Generally, the SSD installation process is the same for all the Acer Aspire A3 Laptops series.
Do Acer Aspire 3 Laptops include M.2 SSD Slot?
Yes, Acer Aspire 3 laptops do include an additional M.2 SSD slot. Now, you may have another question rolling inside your mind “What SSD storage is compatible for the Acer Aspire 3 laptops?” Well, You will have to confirm the availability of M.2 PCIe NVMe SSD support from the Acer customer support.
Moreover, you can move the existing OS to a newly installed SSD and make use of the Hard Drive Disk for Storage purposes.
Most of the Acer Aspire 3 laptops will have a mechanical hard drive working on a SATA port. So, you can definitely go for a SATA 2.5″ SSD if no support for M.2 NVMe is there. However, some laptops will just have a single M.2 port where an M.2 NVMe or M.2 SATA SSD will already be placed. However, different variants will have different port configurations and protocols used. So, make sure to confirm your one before proceeding.
In case, if you need more storage then you can go for 1TB, 2TB M.2 Solid-State Drives. Now, you can even get up to a 4TB Storage variant. But, make sure to check the laptop’s compatibility with the drive you are looking to buy.
Note: In case, if you have stored any valuable data in your Laptop Storage kindly, copy those data to an external drive or make use of Reliable Data Backup Software.
Best SATA and M.2 NVMe SSDs for Acer Aspire 3
| Image | Model | Features and Specs | Price |
|---|---|---|---|
 | Samsung 870 Evo | Capacity: 250GB – 4TB Interface: SATA Speed: 550/510 MB/s Endurance: 2,400 TBW | Check Price |
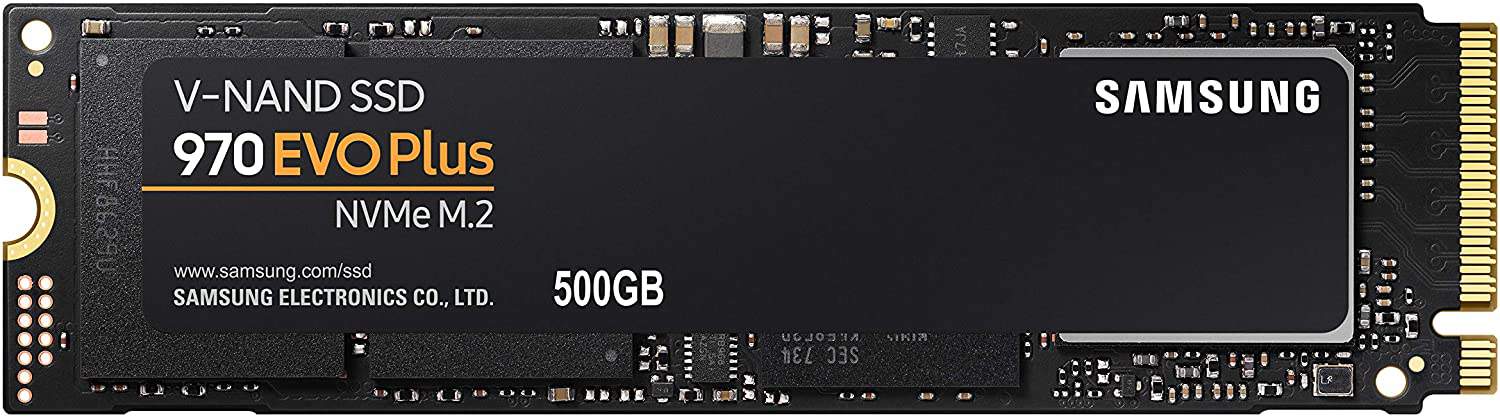 | Samsung 970 Evo Plus | Capacity: 250GB – 1TB Interface: PCIe (M.2 NVMe) Speed: 2200/2000 MB/s Endurance: 720 TBW | Check Price |
Steps to install SSD in Acer Aspire A3 Laptop.
Firstly, get a compatible Screwdriver to start with the stated steps. In case, if you don’t have a compatible screwdriver kindly, get it from Amazon. It’s like a one-time minimal investment, you can make use of the Tool Kit for multiple purposes.
Check Mini Screw Driver Kit on Amazon.
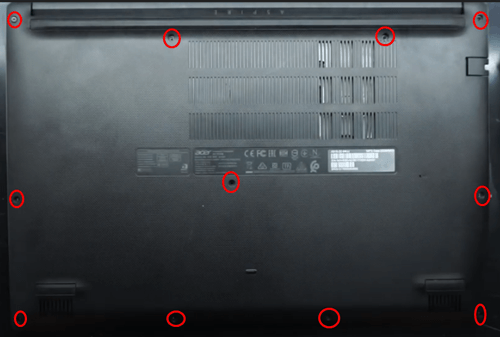
Step 1: Open the Bottom Panel Screws
Turn OFF and Flip your Acer Aspire 3 laptop, and start unscrewing the screws using a compatible screwdriver. Make sure to remove each of them and place them in the proper place. It’s good to keep the screws in some tiny box, to avoid misleads later on.
There can be two types of bottom panels you can see on the Aspire A3 laptops. The first one will have separate openings for HDD, RAM, and Wi-Fi cards. The second one will be a complete cover without any further openings. Let’s see both of them below.

Just confirm which type of bottom cover does your laptop has and start opening the screws right away.
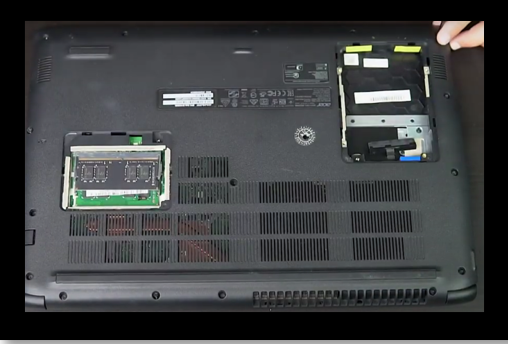
Step 2: Remove the HDD
Now, remove the cover of the HDD and unpin it from the connector. Have a look at the above image for a better understanding. Once, you remove the Hard Disk Drive from the Acer Aspire 3 laptop, drop it at a safe place and proceed further to remove the back panel.

Note: If your laptop doesn’t have an externally removable hard drive like this Acer Aspire 3 315-41, just start opening the main panel and you will find your HDD or the M.2 SSD port inside the system board.
Step 3: Clean the inner surface of Laptop.

After removing the back cover of the Acer Aspire 3 laptop kindly, clear the Dust Particles that exist on the Motherboard using a tiny smooth brush.
Note: Do not mislead any of the cable connectors or wires to avoid unwanted hassle.
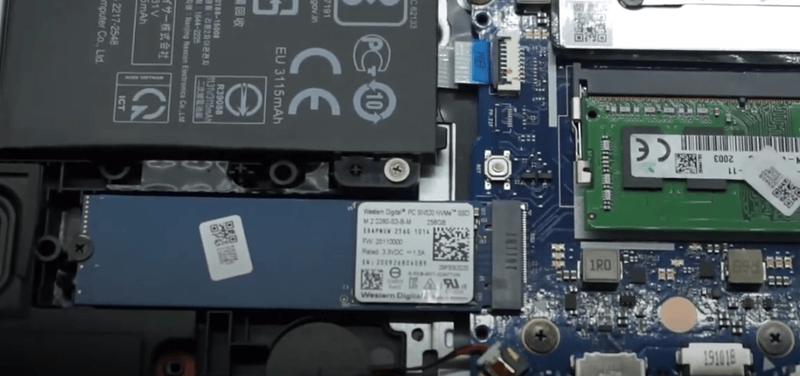
Step 4: Locate the M.2 SSD Slot

Now, locate the M.2 Solid State Drive slot and unscrew the screw. Kindly, have a look at the above image for a better understanding.
NOTE: Some laptops will have an already installed M.2 NVMe SSD just like the image given below. This one is Acer Aspire 3 A315-22 which comes with a single M.2 PCIe NVMe slot that you can use for storage. If you want to upgrade this type of laptop, the only way is to buy an M.2 with larger storage space or make use of your DVD drive with the help of a caddy.
Note: Drop the removed screw at some appropriate Place “Do not mix up with other screws”
Step 5: Fit in your M.2 SSD

Insist you have a look at the above image. Now, you have to insert the M.2 Solid-State Drive at the given slot and adjust the same to the appropriate place.
Step 6: Tighten the SSD screw

Bring back the appropriate screw and tighten M.2 SSD with the Mother Board. Have a look at the above image for a better understanding.
Step 7: Place the Bottom Panel Back
Now, put back the Back Panel of the Acer Aspire A3 Laptop and adjust it properly.
Step 8: Insert Back the HDD

Now, connect the Hard Disk Drive back to the connector. Have a look at the above image for a better understanding. Make sure, you connect the HDD properly to avoid the hassle, later on.
Step 9: Fix the Back Panel with Screws
Kindly, put back the HDD and RAM cover in their proper place. Now, tighten the back panel of the Acer Aspire A3 Laptop with appropriate screws.
Step 10: Mount your M.2 SSD
The final step is to mount the newly installed M.2 Solid State Drive. Kindly, Turn On your Acer Aspire A3 laptop and follow the stated steps.
- Press the Windows key + R keys simultaneously to open the Run Dialog
- Enter diskmgmt.msc and hit enter to open Disk Management.

- Inside the disk management menu, locate your newly installed M.2 SSD
- You will find the SSD with the name tag Unallocated. Have a look at the above image.
- Now, right-click the M.2 SSD Drive and click on “New Simple Volume”

- In case, if you intend to create partitions to the new SSD proceed accordingly, or else finish the process and close the current tabs.
That’s it! You have successfully Installed SSD in an Acer Aspire A3 Laptop.
How to do a clean Windows Install in your new SSD?
Below is the process of installing and activating the new Windows in your Acer Aspire 3.
1. Create Windows Media Creation tool
For this process, you will need a pen drive/DVD in which you can make your bootable media drive. Consider having 8GB space at least in your DVD/pen drive. Make sure to format this drive before using it.

Download Windows Media Creation Tool for the Windows version of your interest. The tool is available for Windows 7, 8.1. and 10.
2. Install the Media creation tool on your pen drive/DVD
Once the download is finished, open this tool. Choose the pen drive as your destination drive and let the Windows get downloaded inside it.
3. Enter the BIOS/UEFI and change boot device
Now, enter the BIOS/UEFI and disable Fast Boot and Secure Boot options. Just press F2 multiple times while the system is starting up and you will enter the UEFI.
- Go to the Advance Mode (F7) and go to the Boot tab. Now disable the Fast boot option.
2. Now, go to the Security tab and disable the secure boot Control option.
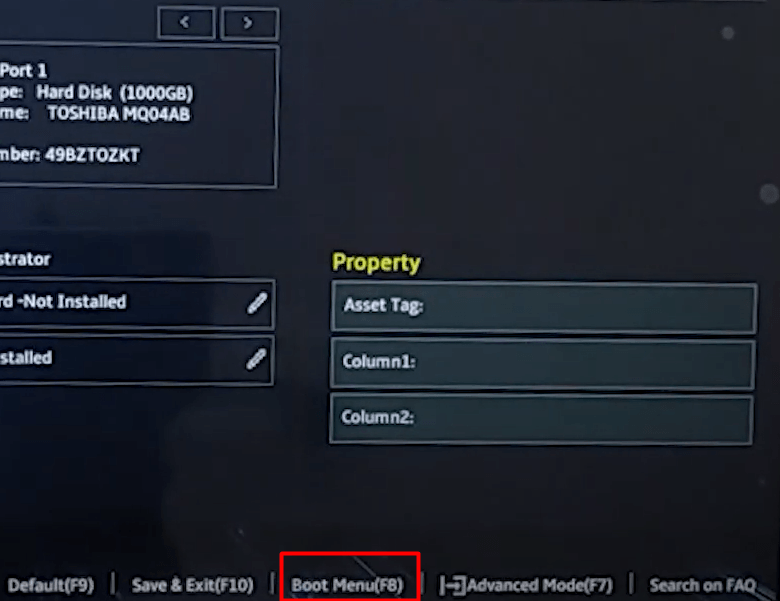
3. Lastly, in order to load your system from the pen drive, go to Boot Menu and select your pen drive or DVD where the Windows is downloaded.
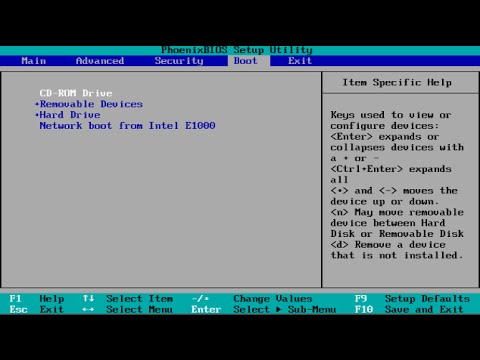
If your laptop is opening with a normal BIOS menu, go to the Boot tab and move the pen drive/DVD to the top to make it your boot drive. See the image below
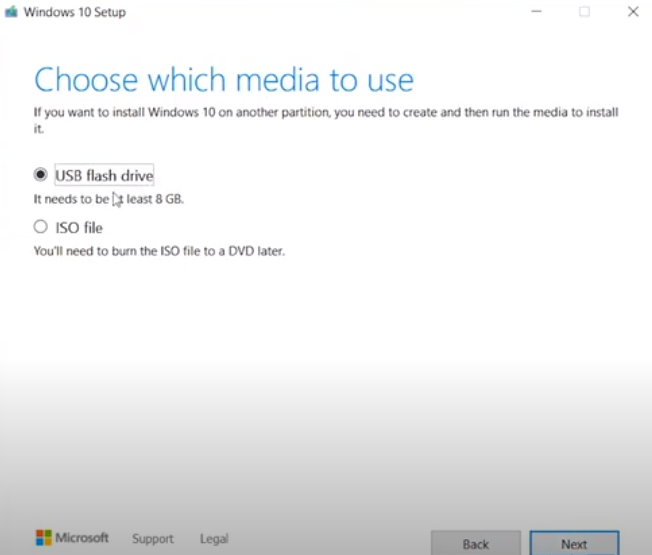
4. Install and activate the Windows
The Windows Setup will start.
When you reach the menu, Where do you want to install Windows?, just choose your SSD and press Next. (You will probably see unallocated with your SSD).
If you have an activation key, just follow this procedure and activate the Windows.
- Go to Windows Control Panel.
- Click on System and security. Then select System.
- Click “Get more features with a new edition of Windows”.
- Select “I already have a product key”.
- Then enter your product key and click on Next.
For more information on Windows activation, visit this page.
Conclusion
Note: “Installing SSD in Acer Aspire A3 Laptop” is quite a simple task, you can get it done on your own but if you’re not sure to implement the stated steps kindly, get help from an expert “Technician”
If you have any doubts or queries related to the topic, just get in touch with me.
Thanks for reading!
My Favorite SSDs in 2021!
| Image | Model | Features and Specs | Price |
|---|---|---|---|
| Samsung 870 Evo | Capacity: 250GB – 4TB Interface: SATA Speed: 550/510 MB/s Endurance: 2,400 TBW | Check Price |
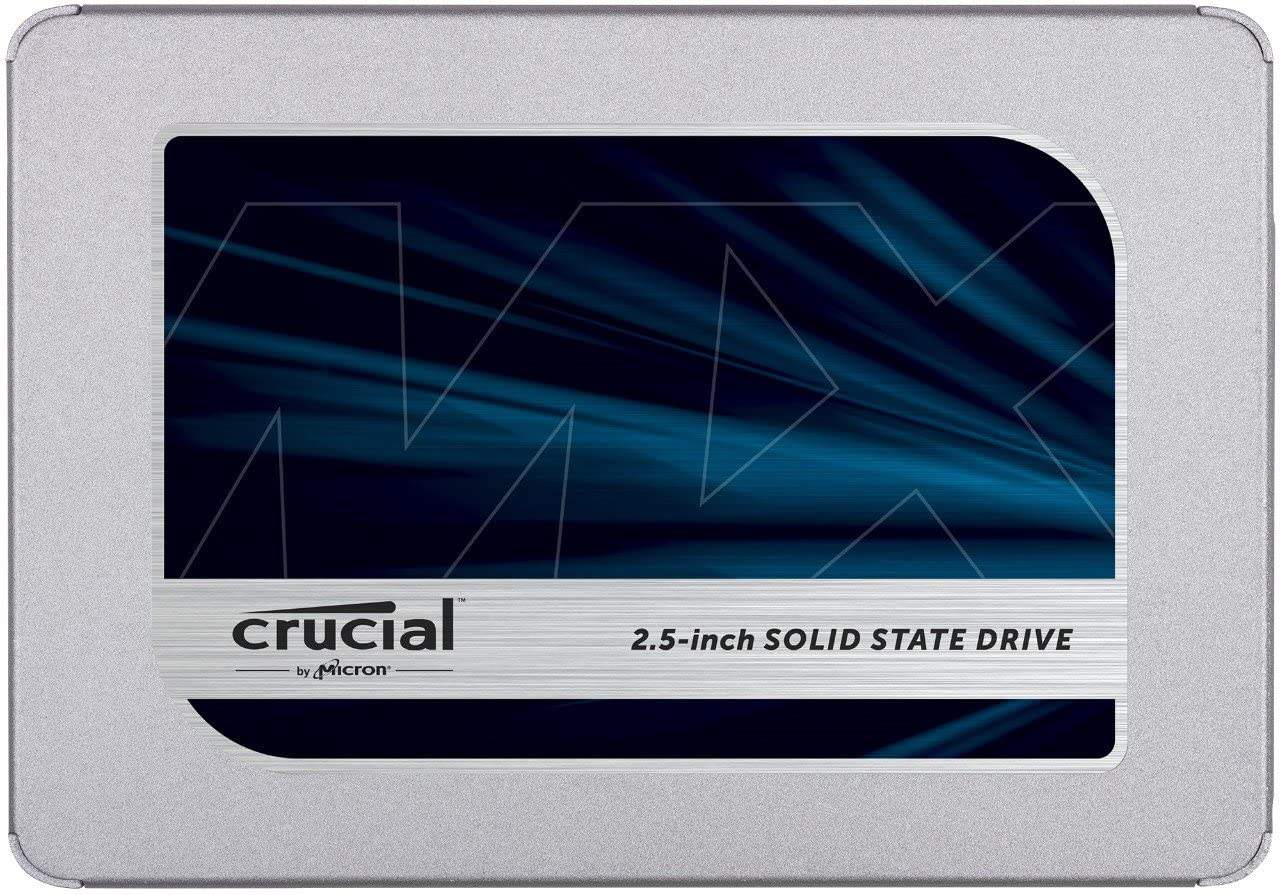 | Crucial MX500 | Capacity: 250GB – 4TB Interface: SATA Speed: 560/530 MB/s Endurance: Up to 700 TBW | Check Price |
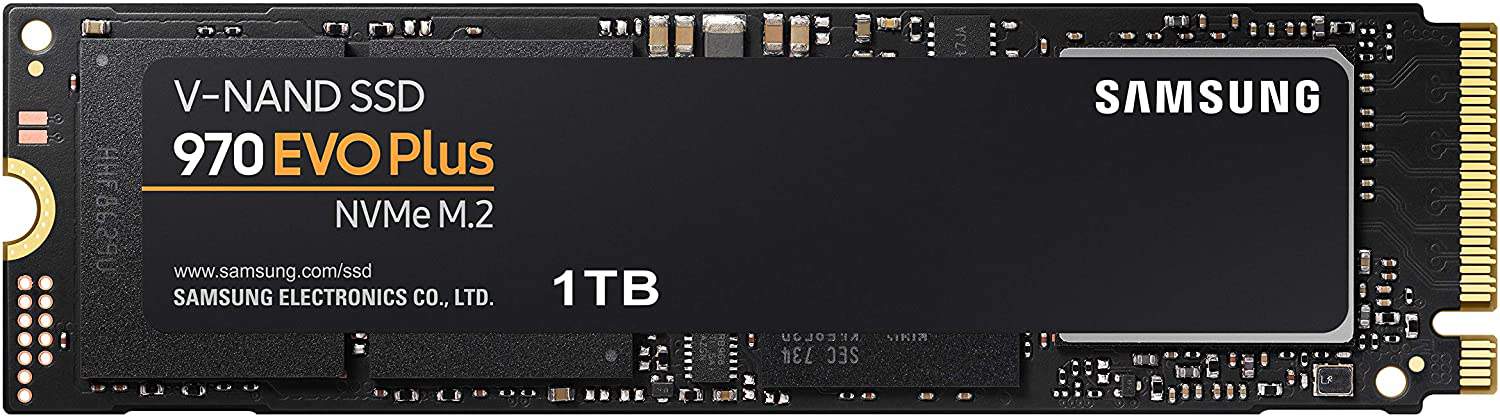 | Samsung 970 Evo Plus | Capacity: 250GB – 2TB Interface: PCIe 3.0 Speed: 3500/2500 MB/s Endurance: 1200 TBW | Check Price! |
 | Crucial P5 | Capacity: 250GB – 2TB Interface: PCIe 3.0 Speed: 3400/3000 MB/s Endurance: 1200 TBW | Check Price! |
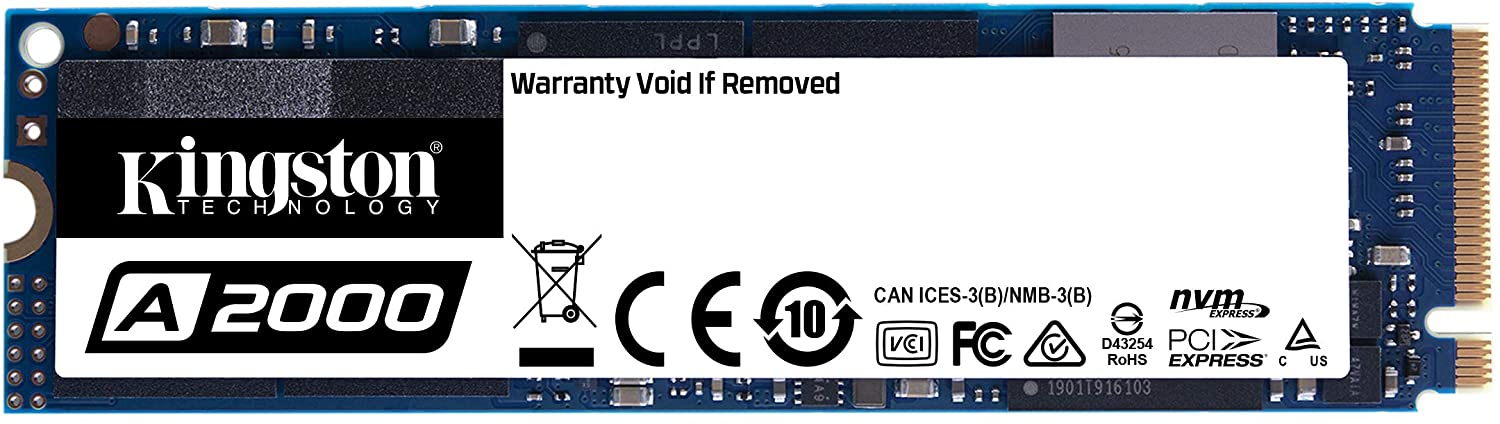 | Kingston A2000 | Capacity: 250GB – 1TB Interface: PCIe 3.0 Speed: 2200/2000 MB/s Endurance: 600 TBW | Check Price! |
i have acer aspire 2 a15-21 model when i install the m.2 nvme 256 gb ssd my laptop is not detect the ssd . I Check in devmgnt.msc , bios , diskmgmt.msc it isn’t showing . I tried 2 diff. ssd but still no showing what should i do ?/
It is possible that you are not mounting your SSD before you can actually use it. Can you attach a screenshot from the Disk Management menu? Or get in touch with me on my contact email.
I got it sir, what you saying but I double check the disk management there NO Unlocated space is showing ! Correction – model acer aspire 3 a315-21
Is that possible it only support 128 gb m.2 ssd ? Bcoz I read some form ques sol some people saying that!
Yes, it could be the case. In fact, most Acer Aspire 3 laptops support only 128 GB NVMe storage. I would recommend you getting in touch with the Acer support. They will ask you for laptop’s serial number and tell what kind and size of storage is supported.
Hi, I’d like to upgrade my Acer Aspire 3 A315-35. I have a SATA SSD 2.5″ 1TB drive, but upon opening up the laptop, the spot is available but there is no Caddy to hold the new SSD, or wire to hook it up – what are the specs/parts required (links to these?) so I can make this upgrade possible. Thank you!
This kit will work for your laptop fine. (https://amzn.to/3S5yvnn).