
Whether you are using any model of Acer Aspire E15, this laptop will always have a hard drive as the primary storage medium. We all know that these rotating disk drives become slow with time. So, it is possible that this slow speed starts to bottleneck your Acer Aspire E15’s overall performance.
If you are seeing any of these signs, your laptop is mostly probably asking for the storage upgrade. So, if you are also looking to upgrade or install an SSD in your Acer Aspire E15 laptop, I am going to help you with that in this article.
We will see which SSD is perfect for your laptop and then how to install it inside the laptop. So, without any further delays, let’s get started.
Note: Some models of Acer Aspire E15 don’t support the M.2 SSDs. On those laptops, you just have the option to replace the existing Hard Disk with a 2.5″ SATA-3 SSD. A SATA-3 SSD will have way better performance as compared to the hard drive but slower as compared to the M.2 NVMe drives.
Which SSD is supported in Acer Aspire E15?
There are numerous models of Acer Aspire E15 in the market. Some of the cheaper ones may not support any M.2 SSD at all. But, if your one has a good processor, it may support the NVMe M.2 SSD. So, this depends totally on your laptop’s model and its price.
In my case, I am working with the Acer Aspire E15 E5 575. It supports the M.2 NVMe SSD perfectly both physically and in the BIOS. You can confirm this thing from your user manual. You can also follow this SSD compatibility guide to know more. Or you can go through this buying guide.
Also, you can open the laptop directly and see if the NVMe port is available on the motherboard. You can go down and see how to find the M.2 port on your E15 laptop.
Best SSDs to upgrade Acer Aspire E15 Laptop
I am going to suggest to you one excellent NVMe and one SATA 2.5″ SSD. These SSDs are having their own cache memory, TLC NAND, and 5-Years warranty period. Let’s have a look at them.
| Image | Model | Features and Specs | Price |
|---|---|---|---|
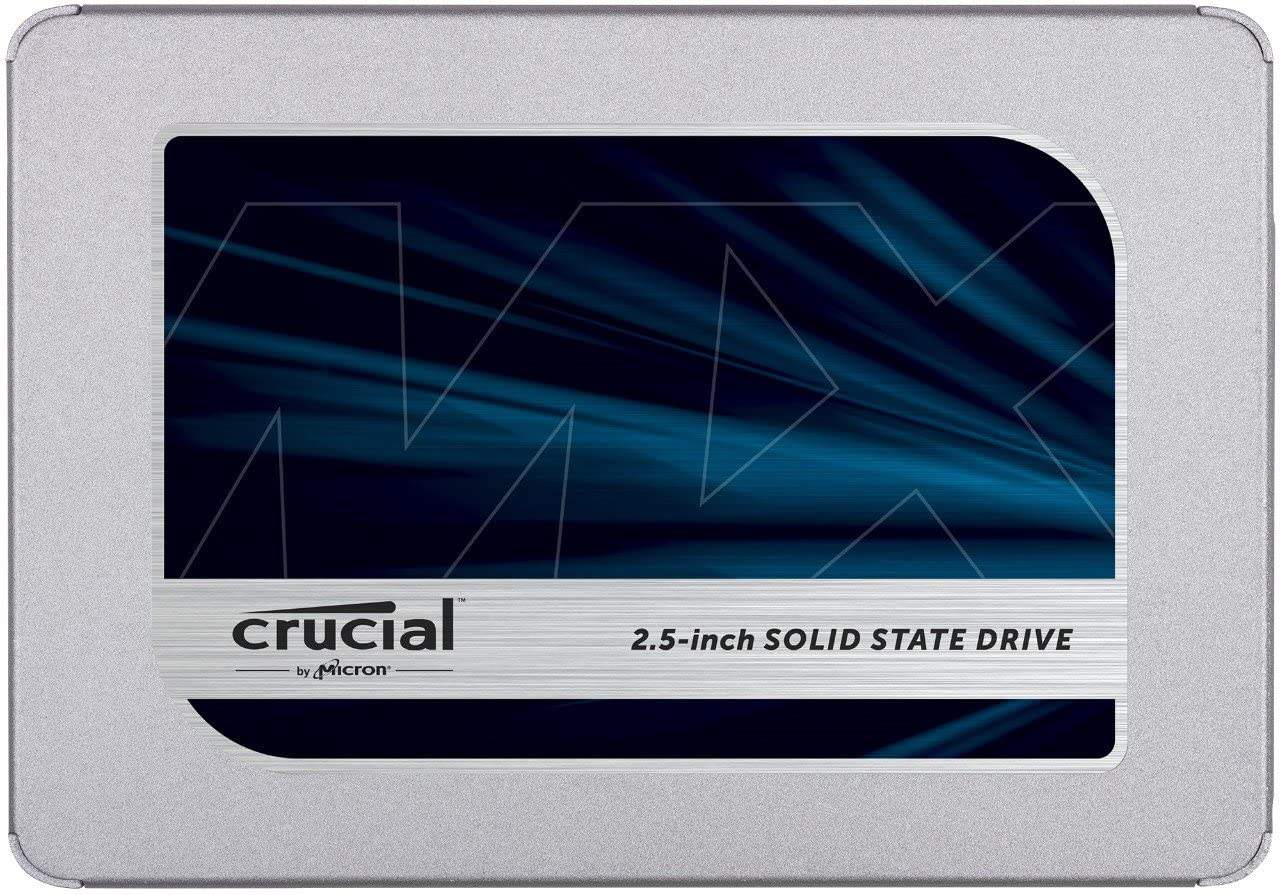 | Crucial MX500 (SATA) | Capacity: 250GB – 4TB Interface: SATA Speed: 560/530 MB/s Endurance: Up to 700 TBW | Check Price |
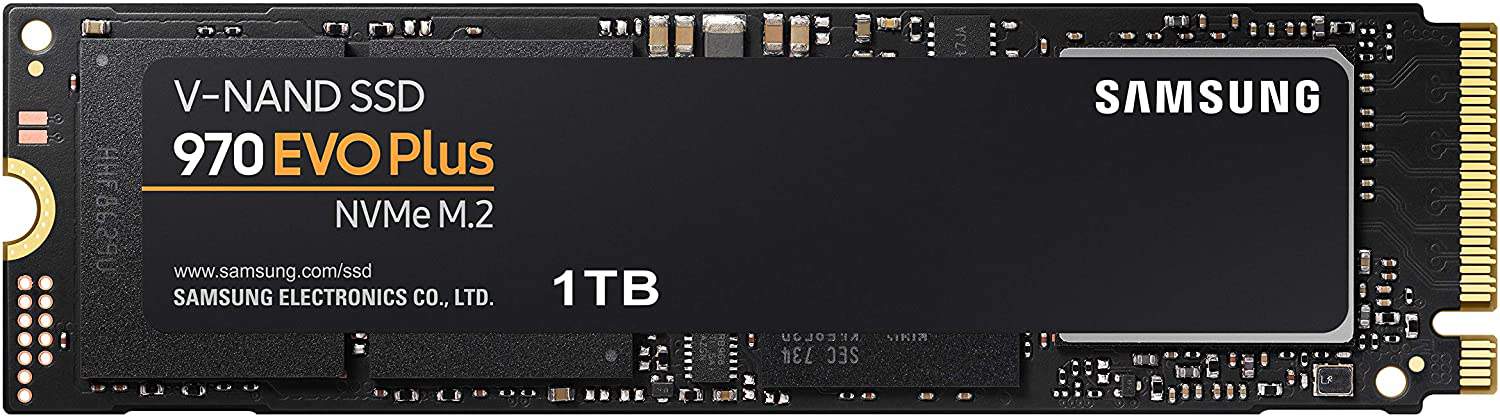 | Samsung 970 Evo Plus (M.2 NVMe) | Capacity: 250GB – 2TB Interface: PCIe 3.0 Speed: 3500/2500 MB/s Endurance: 1200 TBW | Check Price! |
Steps to install/upgrade SSD in Acer Aspire E15?
1. Take a Backup
Make sure to have a proper backup of your data. The SSD installation or upgrade is pretty simple but there could be some issues if you do something wrong. So, in order to stay on the safer side. Make sure to have a backup.
On your Acer laptop, you can simply open the Acer Care Center app and take the backup in an external drive. This drive must be empty and have at least 16GB of storage space.
2. Preparation
In this step, make sure to have a cross-head Phillips #1 screwdriver. You can also use an anti-static wrist strap if you have one.
On the bottom, you will find a pinhole to reset your battery. Take a sim-ejector pin and push it in that hole for 10 seconds. Now, you are ready to proceed further with the installation.
3. Open the cover
Now, take your screwdriver and open three screws that are holding the secondary cover on the bottom.
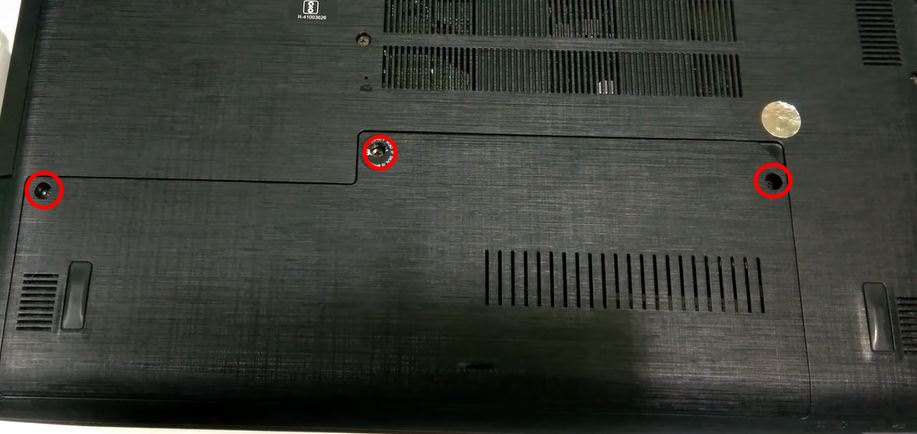
Once, the screws are opened, put your nail or a prying tool inside the notch on the right side. With a little pulling effort, you can take that cover out from the body.
3. Install your SSD
Now, you can simply install an M.2 SSD if your laptop supports it. Otherwise, you may want to replace the hard disk with a 2.5″ SATA SSD. Let’s see the processes for both.
3.1 Install an M.2 SSD
Locate the M.2 port and its screw. It is placed just beside your RAM chips. See the image.
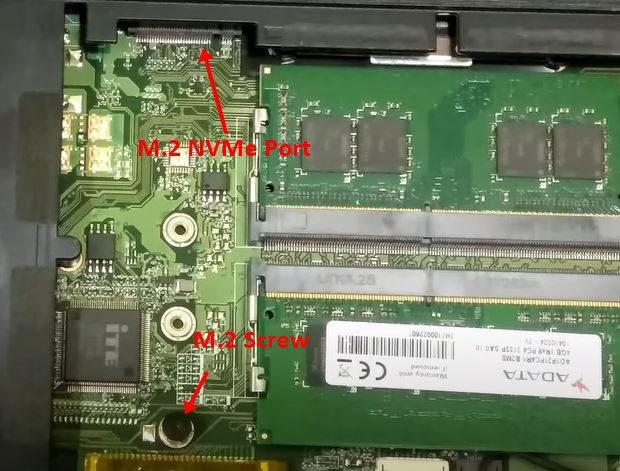
In order to install your M.2 SSD on its slot, just take the M.2 screw out first of all. Then, insert your M.2 NVMe SSD inside the port at an angle.
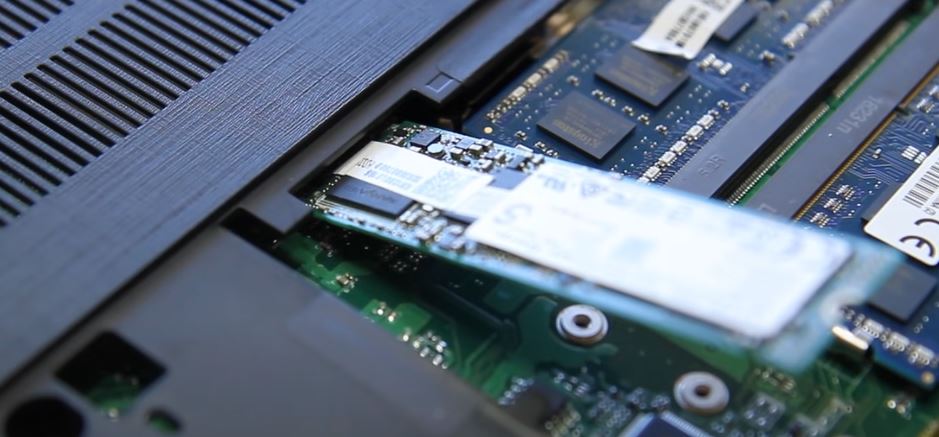
Once the SSD is inside its port, push it down and tighten the screw over it.
3.2 Replace the Hard Drive with 2.5″ SSD
Because the dimensions of a 2.5″ hard drive and 2.5″ SATA SSD are the same, you can simply take your existing hard drive out and then install your 2.5″ SATA SSD at the same place. Simply slide the Hard drive out from its port and take it out. No screws are required to be opened.
Then, you can push the 2.5″ SATA SSD inside the same port and that’s it.
But, if you want the same Windows and data to be moved to your new drive, you will first have to move it to your SATA Drive before installing. You can use this USB to SATA cable in order to copy all the data from your hard drive to the SATA 2.5″ before you actually install it inside the laptop.
In order to move the data and Windows seamlessly, you can use the Macrium Reflect Free software.
4. Close the back panel
Put the back cover in its place in the way you took it out. Then, you can tighten the screws back and you are done with it.
5. Mount your SSD
In some cases, your SSD won’t work if you don’t mount it. You can follow this article to know how to mount your SSD after the installation.
MX 500 is available more cheaper at tps site. ₹4099 only. Amazon ₹4350
Hi Sunilkumar!
Actually, the prices keep changing and it depends a lot on your country. I would like to know which tps site you are talking about here.