
Acer Predator Helios 300 is a popular gaming laptop series. By the time I am writing this article, this laptop has 15 different variants. Most of these laptops are equipped with Intel i7 11th gen processors. The remaining have the i7 10th gen processor. In some laptops, NVIDIA GeForce RTX 3060 is used and in some top-end models, you will find RTX 3080 as well. But, we are going to focus just on the storage aspects here.
So, in some models of Acer Predator Helios 300, you will see just a single M.2 NVMe PCIe with 512GB or 1TB storage capacity. But, in other ones, your laptop will also have a 1TB HDD accompanied by an SSD.
However, for some people, this storage space might not be efficient. So, for those people, the Acer Predator Helios 300 has another M.2 PCIe NVMe port on the board. In short, there are two M.2 NVMe PCIe ports and one SATA port for SATA 2.5″ hard drives or SSDs.
So, you might be one of those who want more storage space by utilizing either the free M.2 PCIe NVMe port or the SATA-3 port. In both cases, I am going to help you know how to do it on your own. We will know how to install or upgrade the SSD in your Acer Predator Helios 300 gaming laptop using simple steps.
This guide is for some specific models of Helios 300. Make sure to confirm the model name before proceeding.
Note: Some older models of Helios 300 can have different construction and ports as compared to what we are going to see further. In that case, I would suggest you go with the user manuals. This tutorial is going to work with the PH315 and PH317 series specifically. The models are as follows.
| PH315-53-72XD |
| PH315-53-736J |
| PH315-53-71VG |
| PH315-53-71HN |
| PH315-53-70QE |
| PH315-53-76JX |
| PH315-53-78XB |
| PH315-54-760S |
| PH315-54-731M |
| PH315-54-78WN |
| PH317-55-77S4 |
| PH317-55-71YX |
| PH317-55-743T |
| PH315-54-748Y |
| PH317-55-759N |
Some other models can also have similar ports and construction but I can’t guarantee that. But, you can surely follow this guide line-by-line for these specific models.
How to install an M.2 PCIe NVMe SSD in Acer Predator Helios 300 Laptop?
Because there is a free M.2 PCIe NVMe port available on your laptop, you will face no issues with the installations. You just have to open up your laptop and install your SSD. Follow the steps given below.
Step 1: Open the back panel
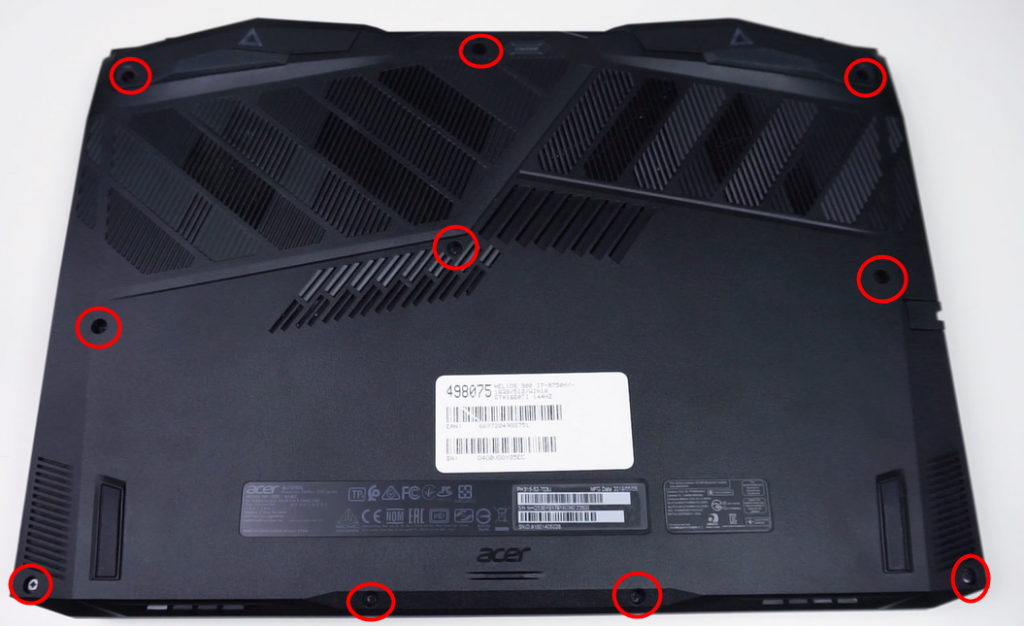
Make sure to power off your laptop and disconnect the power cord. Now, turn your laptop and face its bottom to yourself. Take a PH0 or PH1 screwdriver and start opening the bottom screws one by one. You will find 10 screws on the bottom. Open all of them. See the image to check the locations.
Step 2: Take the backpanel out
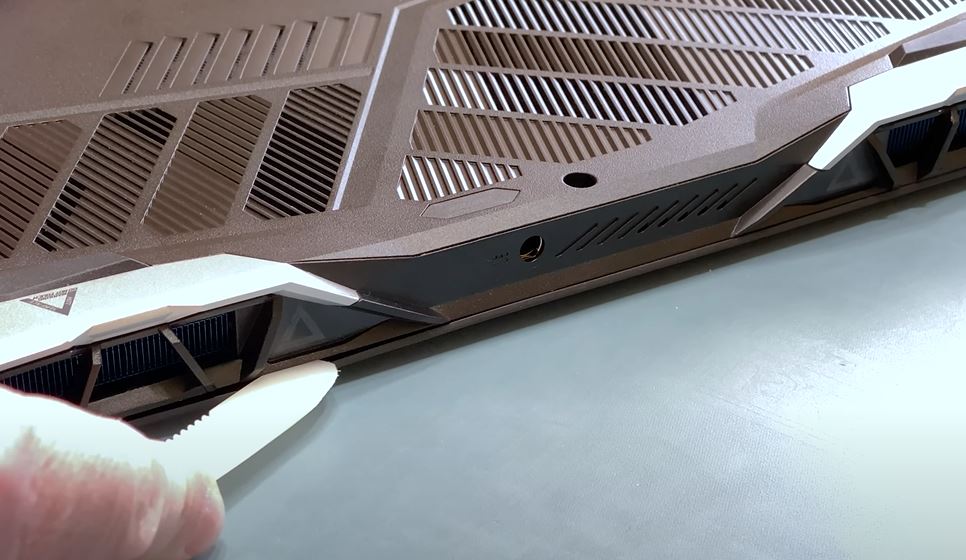
As usual, the back panel will have some internal plastic clips to stay attached to the body. Now, in order to release those clips, you will have to use a pry tool. You can use any thin but strong piece of plastic to do the same. Start unlocking the panel from the air-vent side as shown in the image.
Once all the clips are released, use your hand to gently take the back panel out. Pulling up this bottom cover will not be very tough now. But, don’t push too hard. If you are not able to do it from any side, use the pry tool again to release any clip.
Step 3: Disconnect the battery
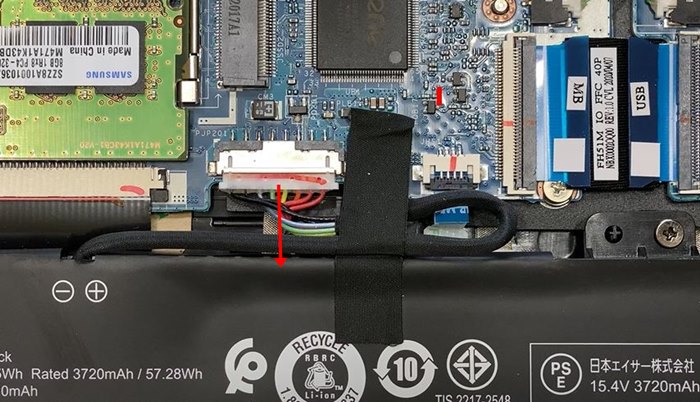
This laptop has an internal battery. So, when the back panel is opened and you are seeing the mainboard along with the battery, make sure to disconnect the battery from the mainboard first of all. Just remove the connecting wire as shown in the image below.
Step 4: Open the M.2 SSD Screw (Heatsink if available)
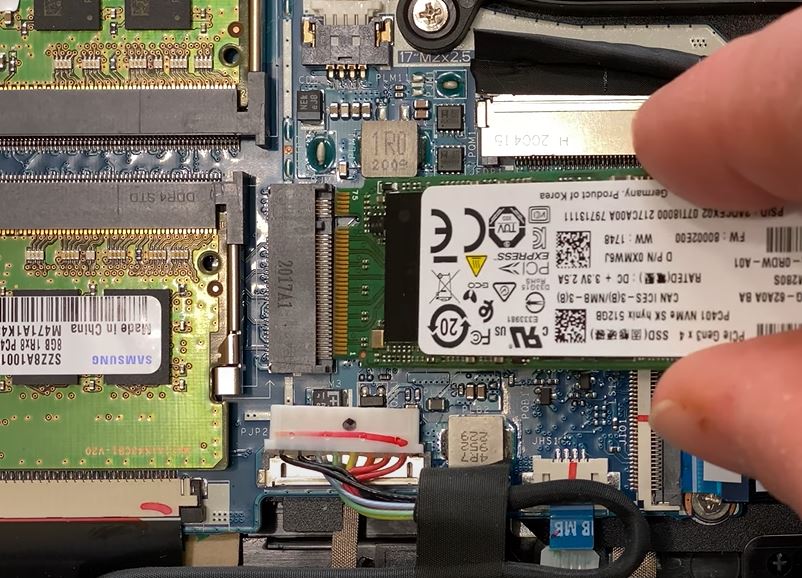
Locate the free M.2 port on the board. It will be available just beside the RAM slots and in front of your battery connector. See the image if you don’t know anything about it.
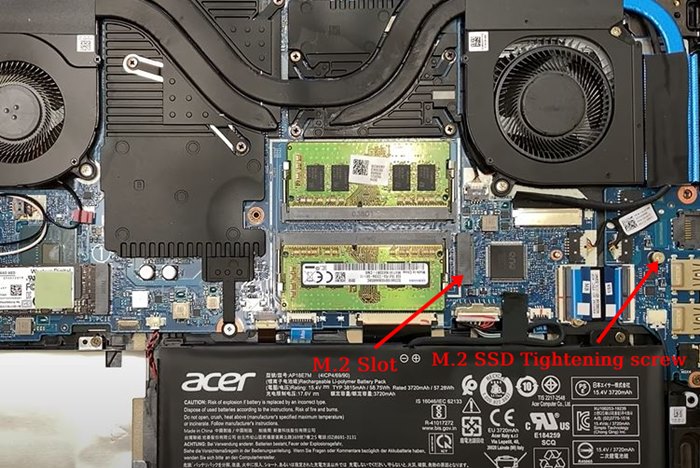
Untighten the screw so that the SSD can fit inside the slot. In some models, you will see that there is a heatsink attached to the port. Don’t get confused by that. You will have to open the same screw and the heatsink will be free from the board. After the installation, you can just tighten the same heatsink over your SSD.
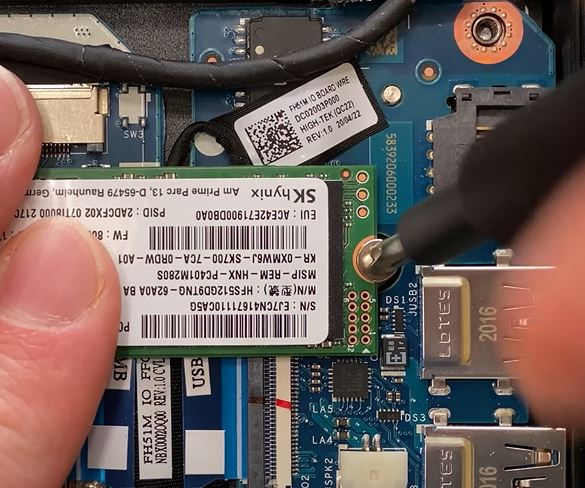
Step 5: Insert the SSD and tighten the screw
This is our final step where you will insert your SSD inside the M.2 port and tighten it up. Make sure to keep the main side of your SSD (printed) to the front and then pull it gently inside the port. Make sure to insert it at an angle as you can see in the image.
When the SSD is inserted inside the M.2 port, you just have to tighten it using the screw. So, just push your SSD to the board and tighten the screw that you just opened.
Step 6: Reconnect the battery and place the lower case back
Now, just insert the battery connector back to its port and place the bottom panel on the body. Apply gentle pressure on the panel so that the clips can get placed in their location. Now, you can tighten the screws, and that’s it.
Watch this video for a visual guide:
How to install a SATA 2.5″ SSD/HDD in Acer Predator Helios 300 laptop?
If there is a free SATA port available on the laptop, you can also install a SATA 2.5″ SSD on the board. The speed of the SATA SSD is low (up to 600MB/s). So, they are perfect for raw storage because even this speed is way better than the traditional hard drives. Let’s see how you can install a SATA 2.5″ SSD to your Helios 300.
Step 1: Follow Step 1,2,3 in the above section to open your laptop
You will have to open the back panel in order to install your SSD on the mainboard. I have discussed everything related to it in the above section where we had installed an M.2 NVMe SSD to this laptop.
Step 2: Locate the hard drive bracket and open the screws
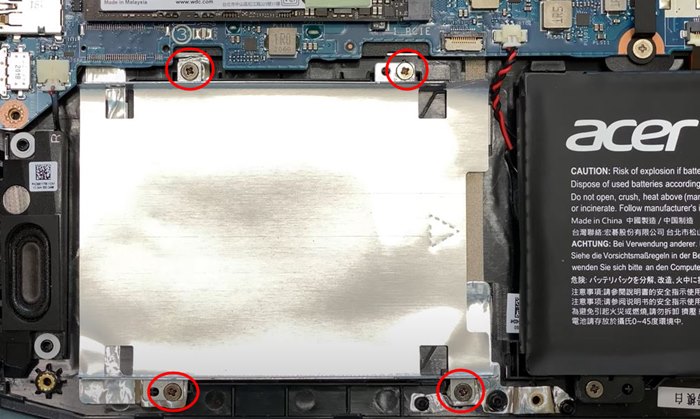
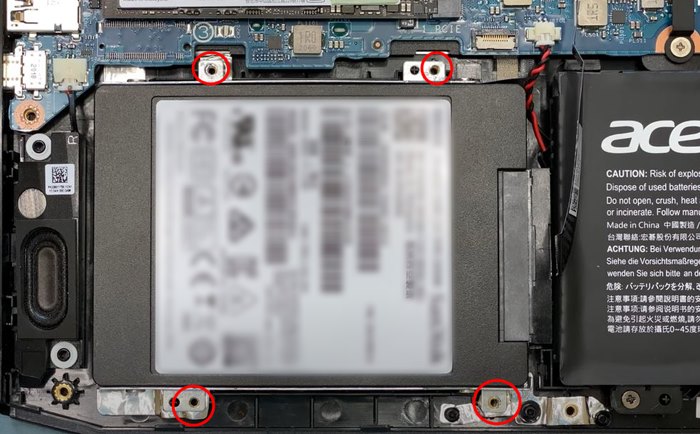
Now, there can be two different cases. Either your laptop will have a pre-installed Hard Drive or you will see a free 2.5″ SATA bay free for a new installation. In both cases, you will have to open these four screws as shown in the image.
Note: You will find a small bag in your laptop box. Inside this bag, you will get a laptop SATA cable along with 4 screws for the installation purpose. They are required for this installation. If you don’t have these, you can buy a set from here.
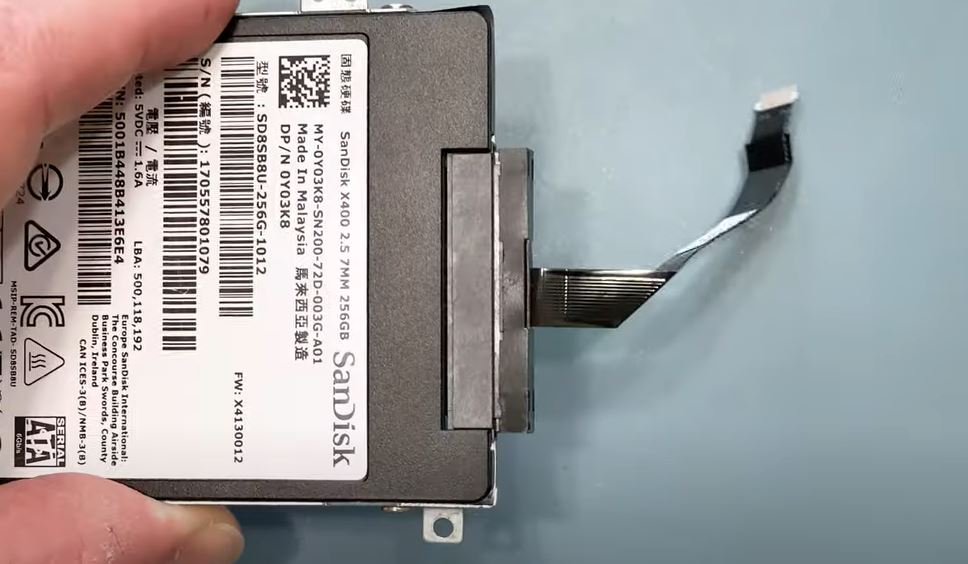
Step 3: Connect the 2.5″ SSD/HDD to the mounting bracket
In my case, I am using a SATA-3 2.5″ SSD. But, you can also install a SATA 2.5″ Hard Drive using the same method. Just place your drive inside the bracket and tighten it with those four screws. See the image for reference.
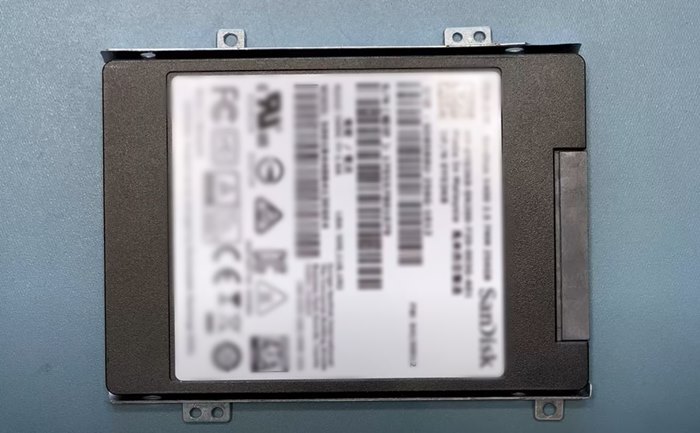
When you place your 2.5″ drive on this bracket, you will see that four screws on its sides will align with the bracket. Just take those four screws that came along with that extra pouch inside your laptop. In some cases, your SSD will come along with these screws. So, you can use them as well.
Step 4: Connect the SATA cable to your drive
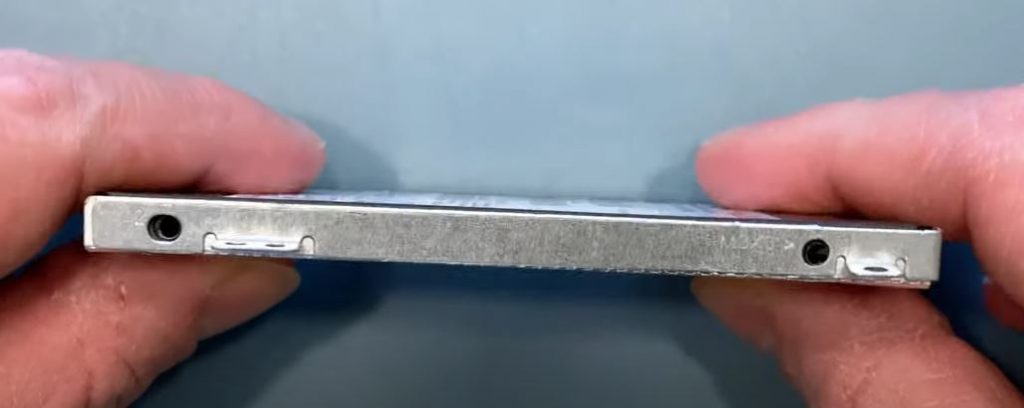
Whether you are installing a SATA 2.5″ SSD or HDD, the same connector will work for both. Just connects its bigger end to the SSD as shown in the image below.
The connector will fit from one side only. So, make sure to do it properly.
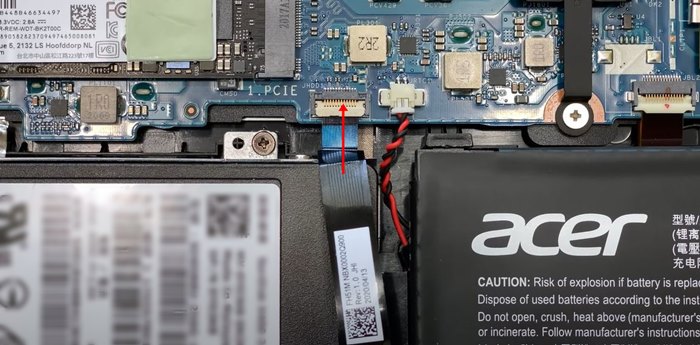
Step 5: Install the drive and connect the cable to the board
Now, place your SSD along with the bracket from where you took it out. Also, connect the second end of that cable to the board as shown in the image.
Watch this YouTube video from the official channel for visual information.
Can you install an M.2 SATA SSD to this laptop?
If you see inside your laptop, you will see that a WD Black SN750 NVMe SSD is used as the primary drive. But, if you want, you can either choose another M.2 NVMe or a simple M.2 SATA SSD as well. Because the M.2 PCIe NVMe port available on your laptop is also compatible with the M.2 SATA SSDs, you can use a SATA M.2 SSD as well on the same port.
But, it is always better to make the best use of your NVMe port. So, I would suggest you use an NVMe SSD. Again, checking the port specifications is important before making the purchase. The storage device is mostly non-replaceable. So, do everything with proper planning and prior confirmation.
You can read more about the difference between M.2 SATA and M.2 NVMe SSDs in this article.
Which SSD is best for the Acer Predator Helios 300 laptop?
For brief information on choosing the best SSD for any laptop, you can read this buying guide. Any M.2 NVMe SSD (Whether PCIe 3.0 or PCIe 4.0) will work with your Helios 300 laptop. I would suggest you go for good SSDs because your laptop is made for tough usage. Some popular names are Samsung 970 Evo Plus, Samsung 980 Pro, Gigabyte Aorus, Crucial P5, Kingston A2000, etc.
In the case of SATA 2.5″ SSD, you can go for Samsung 870 QVO, Crucial MX500, Sk Hynix Gold S31 Gold, etc. Make sure to buy an SSD with DRAM/SLC cache and at least TLC (Instead of QLC) NAND. You will not regret your decision.
Note: Different variants of your laptop can come with different configurations. So, make sure to confirm the specifications and user manual before buying any SSD.
Frequently Asked Questions
Your SSD should have a 2.5″ form factor in order to work on its dedicated SATA slot. But, you can also use a SATA SSD in M.2 form factor which will be installed on its M.2 PCIe NVMe port.
But, different models may come with different port configurations.
So, I would strongly suggest you check your device specification and user manual to see which interface is supported. You can get in touch with customer support for better information.
Your Helios 300 is already working with an NVMe M.2 SSD which is pretty faster than any other SSD available in the market.
Yes. This laptop comes with a SATA-3 2.5″ Drive bay. So, you can either install a 2.5″ SATA SSD or a 2.5″ SATA HDD as well. But, you can’t install a 3.5″ Hard drive on this laptop.
Yes. You can do it on your own. Opening up the back panel can be difficult for some people. Otherwise, all other installation tasks are easy as we discussed in this article.
Make sure to mount your SSD if it is not showing up. If it is not appearing even after that, there could be issues with the compatibility.
Some of my Favorite SSDs in 2021
| Image | Model | Features and Specs | Price |
|---|---|---|---|
 | Samsung 870 Evo (SATA) | Capacity: 250GB – 4TB Interface: SATA Speed: 550/510 MB/s Endurance: 2,400 TBW | Check Price |
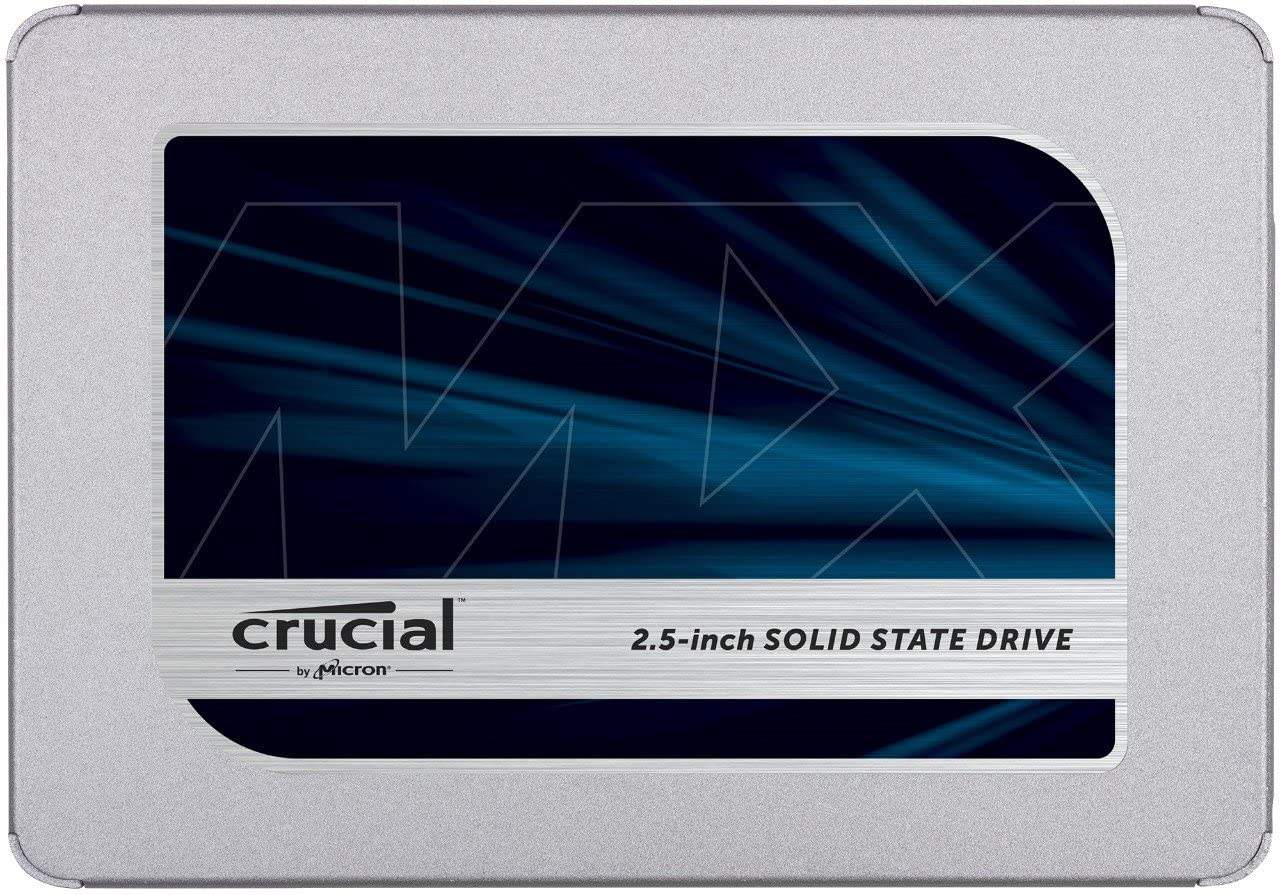 | Crucial MX500 (SATA) | Capacity: 250GB – 4TB Interface: SATA Speed: 560/530 MB/s Endurance: Up to 700 TBW | Check Price |
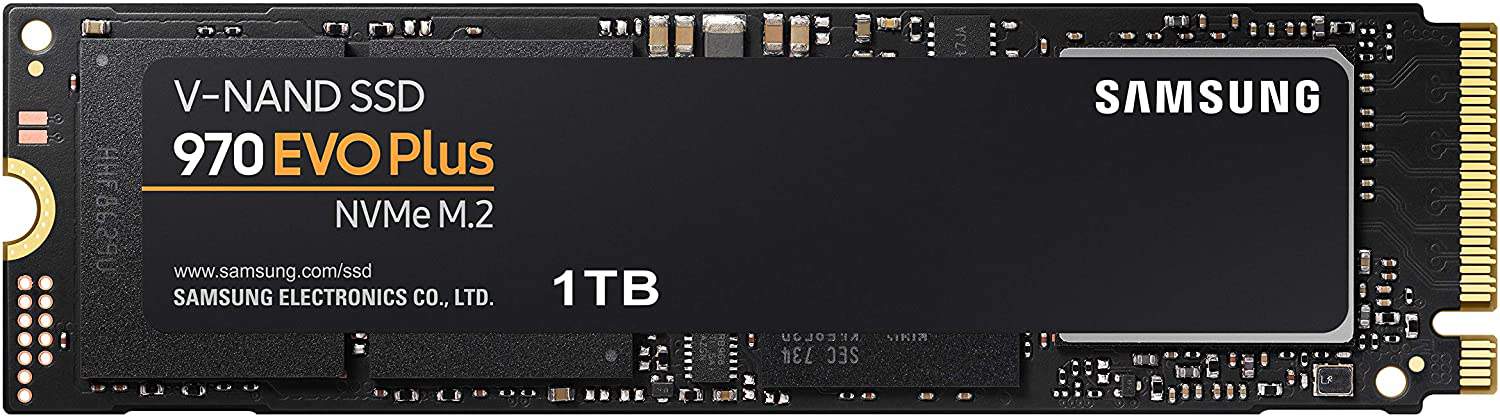 | Samsung 970 Evo Plus (NVMe) | Capacity: 250GB – 2TB Interface: PCIe 3.0 Speed: 3500/2500 MB/s Endurance: 1200 TBW | Check Price! |
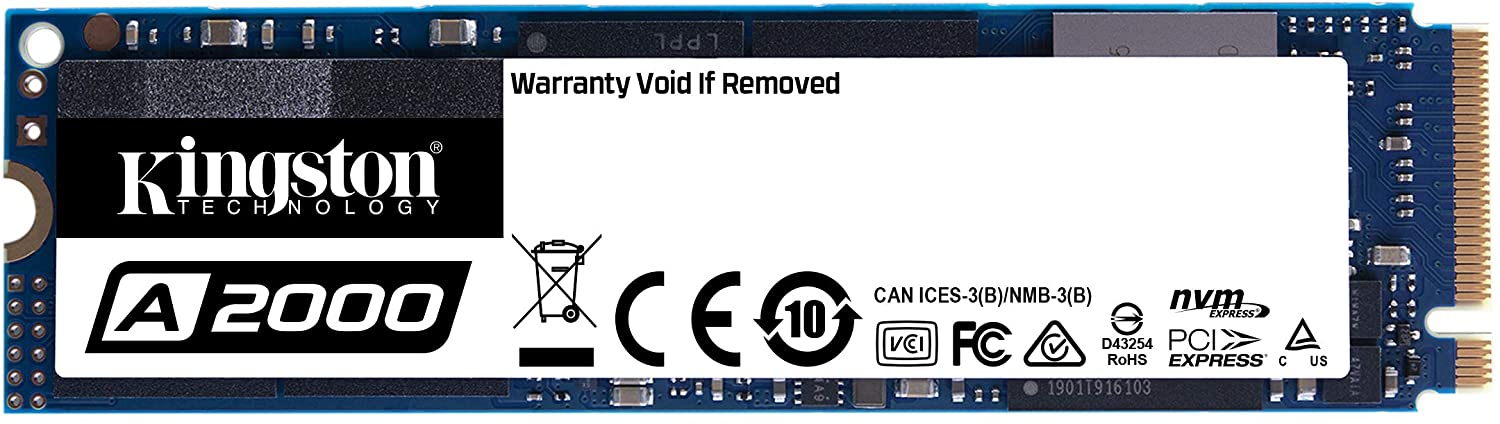 | Kingston A2000 (NVMe) | Capacity: 250GB – 1TB Interface: PCIe 3.0 Speed: 2200/2000 MB/s Endurance: 600 TBW | Check Price! |
Thanks for reading!