
If you are using any model of Lenovo Ideapad 330 laptop, you will only see these storage configurations:
- 128 GB PCIe NVMe SSD
- 256 GB PCIe NVMe SSD
- 500 GB SATA HDD
- 1 TB SATA HDD
- 2 TB SATA HDD
- 128 GB PCIe SSD + 1 TB SATA HDD
- 256 GB PCIe SSD + 1 TB SATA HDD
So, whichever model you are using with any storage type, you can always upgrade this laptop with a new SSD. Now, the type of SSD will depend on the model itself and surely the available storage slots on your laptop.
In most of the top models of Ideapad 330, you will find dedicated M.2 NVMe slots which will either be allocated to an SSD or free. So, you will first have to check what kind of slot is there and then choose the SSD. The configurations will also vary depending on your region.
In this article, I am going to help you choose the right kind of SSD and then install it on your laptop on your own. Let’s get started.
Which SSD can I install on my Lenovo Ideapad 330 laptop?
Depending on your laptop’s model, you can have three different SSD options to choose from. The first one is obviously a SATA 2.5″ SSD.
Secondly, you can install an M.2 SATA SSD.
And, the third option is an M.2 PCIe NVMe SSD. The SATA 2.5″ SSD can be installed on all models of Ideapad 330 because each model will have either a pre-occupied or a free SATA 2.5″ slot. But, in order to install an M.2 SATA SSD, the laptop must have an M.2 SSD slot on the board.
Lastly, if you want to install an M.2 PCIe NVMe SSD, your laptop must have a PCIe and NVMe-enabled M.2 slot. The availability of the M.2 PCIe NVMe slot will depend also on the price of your laptop. As we discussed earlier, these slots are available only on the top models with faster processor options.
Steps to install/upgrade an SSD on Lenovo Ideapad 330?
Opening this laptop is fairly easy. You can do it on your own. But, I would suggest you use proper tools to eliminate any chances of physical damage. Let’s see this process step by step.
Note: For this article, I am using the Lenovo Ideapad 330 (81D100FWIN). All other models will have almost similar outer and internal configurations. So, you can easily relate.
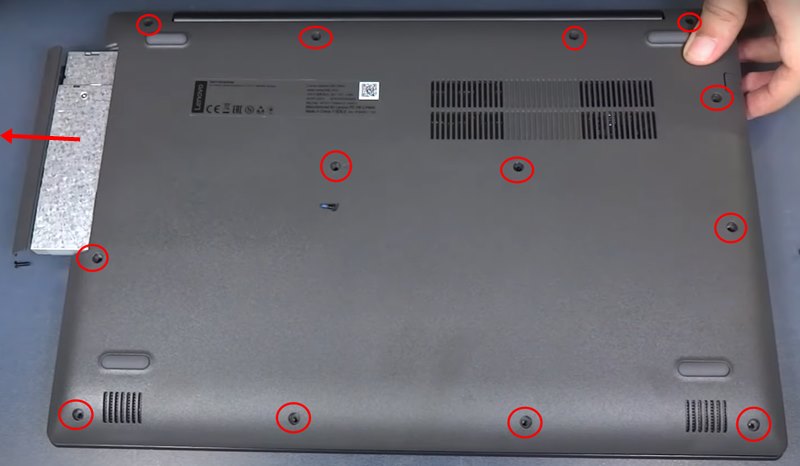
1. Open Screws on the bottom
Make sure to remove the charging cable and then turn off your laptop. Now, turn it to the bottom. On the laptop I am working with, there were 13 screws. But, you can see 10 or 12 screws on your one. So, check for all of them and make sure to see below the rubber feet. The screws can easily be opened with T8, PH0, or PH1 screwdrivers.
Once all the screws are opened, make sure to take the optical disk drive out. See the image for its location.
2. SSD Installation
Now, depending on the type of laptop and your requirements, you may want to use a different SSD. The availability of slots will also make a difference for sure. So, just discuss all the cases here one by one.
Case 1: Replace the Hard Disk with SSD
In the low-end models of Ideapad 330, you will see only a 500GB or 1TB Hard Disk. The same case is here with my laptop as well. This laptop has no M.2 slot on the board. The only slot is the SATA 2.5″ where a Hard Disk is already installed. So, I am going to replace it with a new SSD. Let’s see how I did that.
- Take your Hard Disk out at an angle. (No screws are going to be there with your HDD).
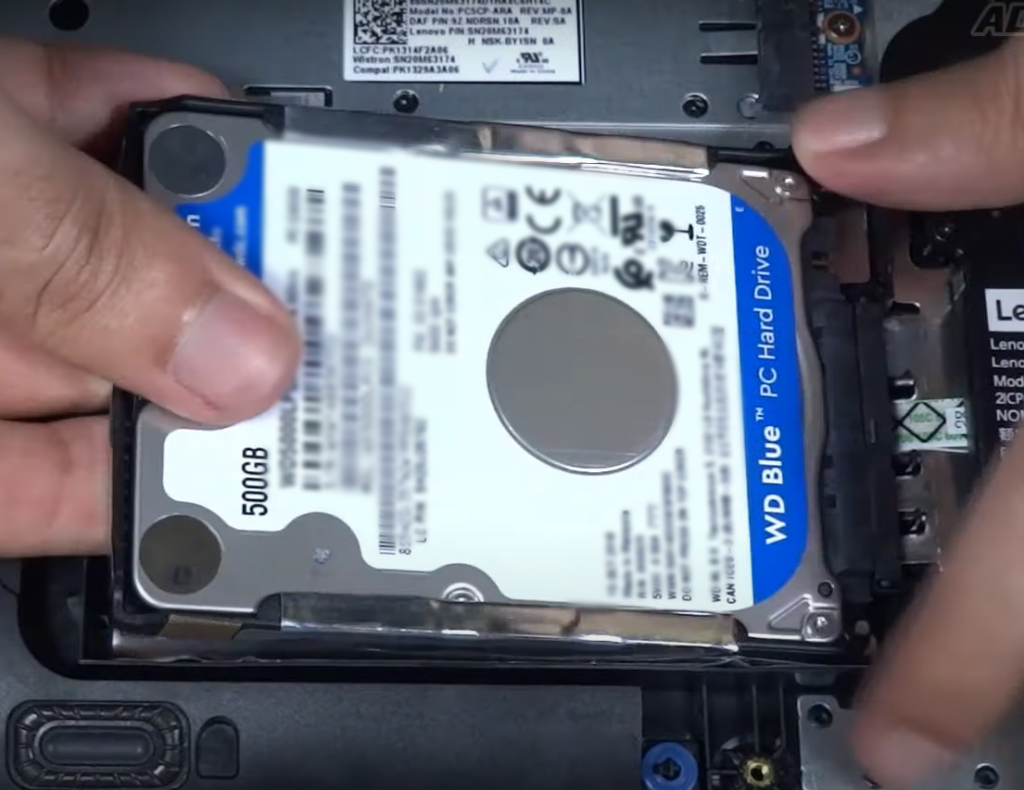
- Release the hard disk from its case.
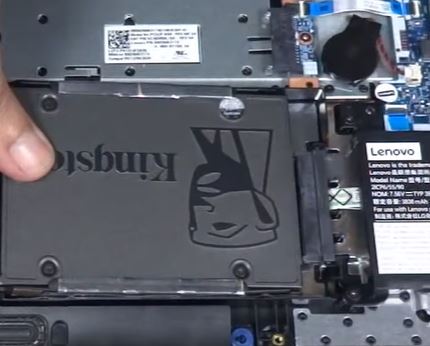
- Install your SSD in the same case and install it back at the same place.
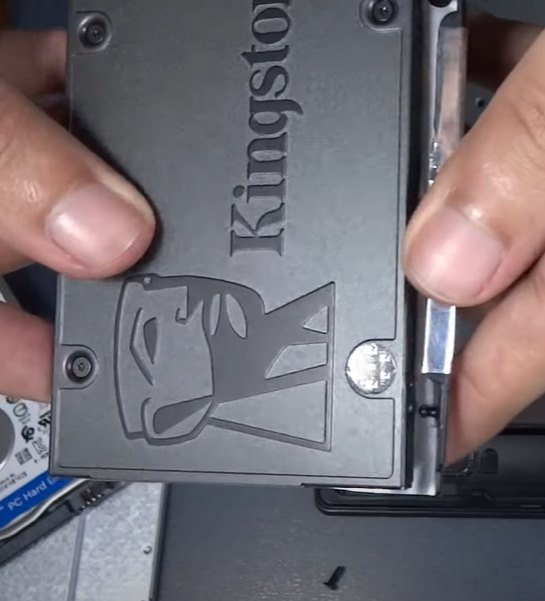
- Make sure to push it inside the SATA port at an angle again.
Case 2: Install an M.2 SATA or M.2 PCIe NVMe SSD
Obviously, your laptop must have an M.2 slot (either SATA or PCIe NVMe) for this process to happen.
Again, keep a thing in mind that an M.2 SATA SSD will work on your M.2 PCIe NVMe slot. But, you can’t use and even install your NVMe SSD on an M.2 SATA-only slot. See this article for more information on M.2 slots.
- Locate the M.2 slot on the motherboard
- Open its locking screw
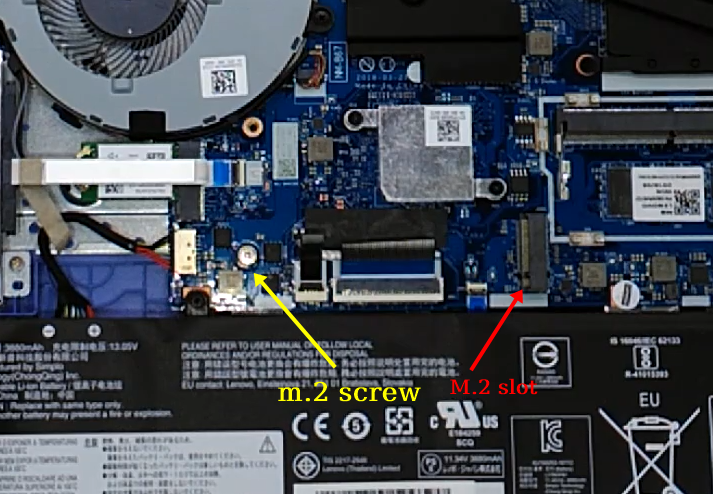
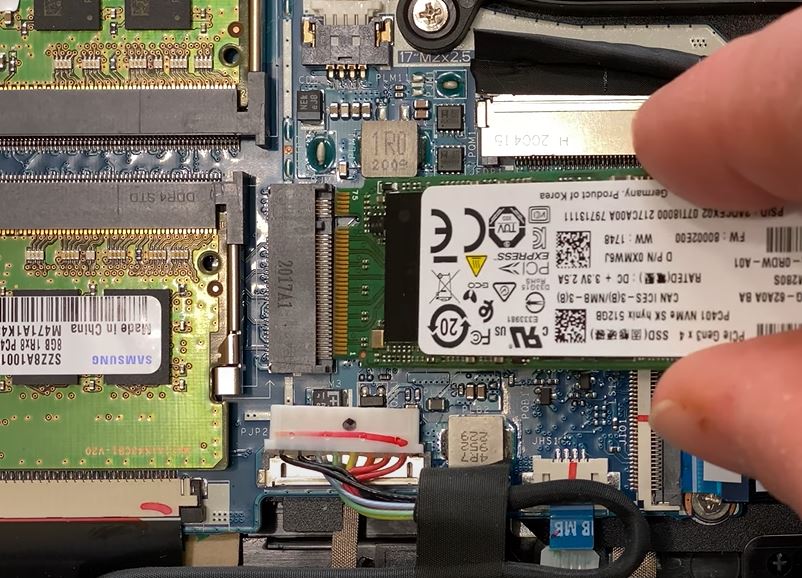
- Insert your M.2 SSD inside the slot at an angle
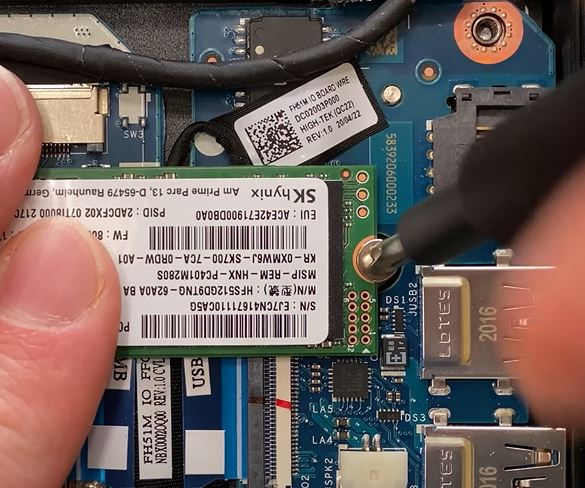
- Push your SSD on the screw hole and tighten the screw gently
Case 3: Keep the Hard Disk inside and replace the Disk Drive with SSD
For this thing, you will need to buy a caddy and install it in the place of your existing disk drive (DVD Drive). This process is going to be a little bit harder because you will have to open your disk drive completely.
In some cases, you may need to mount your SSD if it doesn’t show up in the File Explorer Menu.
3. Close the bottom panel
Once you have installed your SSD using any of the methods given above, make sure to properly attach the bottom cover back and tighten it using the screws. Now, you can turn on your laptop and proceed further. If you want to move the OS from one drive to another, I would suggest using Macrium Reflect software.
Frequently Asked Question
Make sure to go through your laptop’s user manual before you make a purchase of any piece of hardware. It will be good if you just open your laptop and see which SSD is supported and then buy the right product.
If your system is getting bottlenecked by the slow speed of your hard disk, you will definitely see a performance boost. The OS, software, and games will boot up faster. But, you can’t expect an overall performance boost in performance as you get with a RAM upgrade.
Just buy an SSD caddy and replace your optical disk drive with it. Now, you can install your SATA 2.5″ SSD on this caddy and use it for any purpose.
Best SSDs for Lenovo Ideapad 330 (SATA/NVMe)
| Image | Model | Features and Specs | Price |
|---|---|---|---|
 | Samsung 870 Evo (SATA) | Capacity: 250GB – 4TB Interface: SATA Speed: 550/510 MB/s Endurance: 2,400 TBW | Check Price |
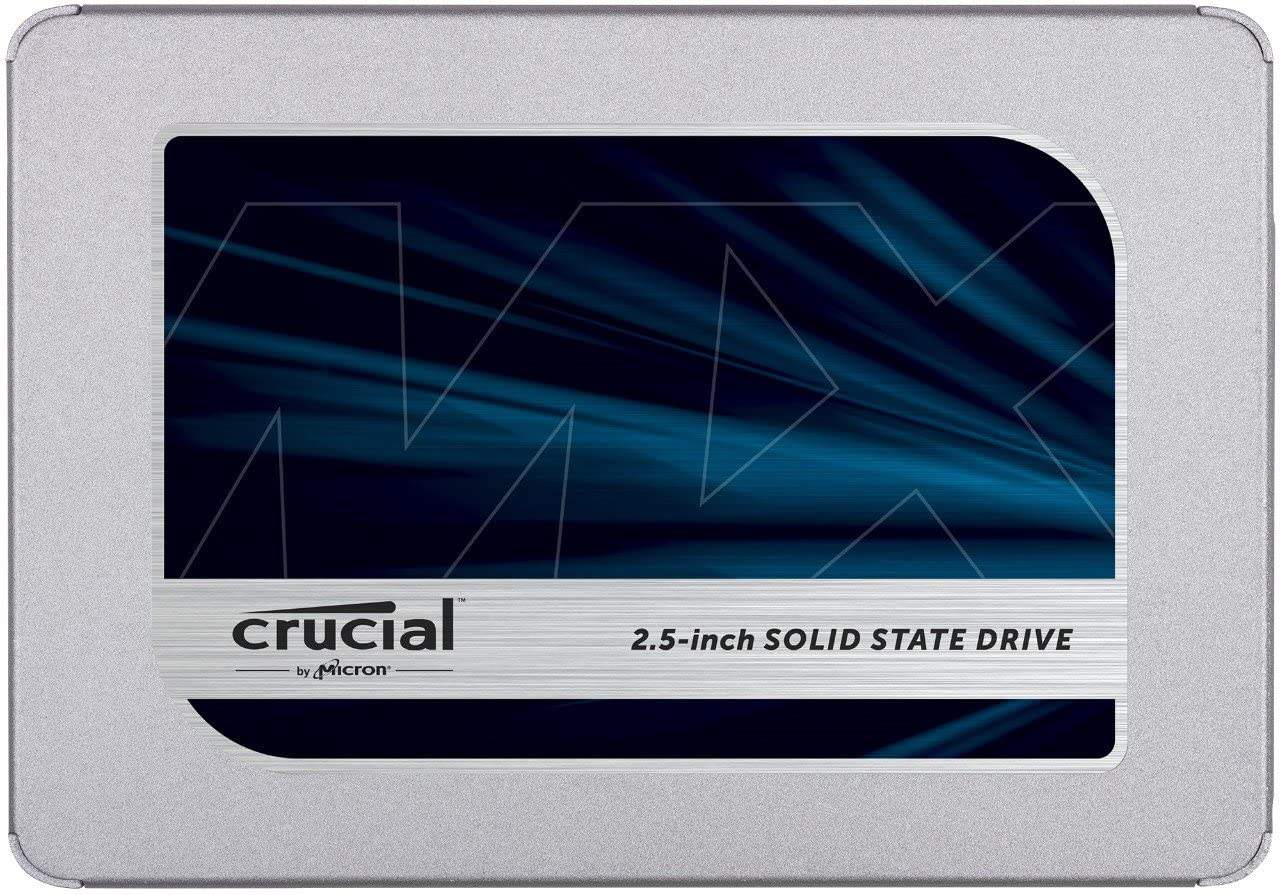 | Crucial MX500 (SATA) | Capacity: 250GB – 4TB Interface: SATA Speed: 560/530 MB/s Endurance: Up to 700 TBW | Check Price |
 | Samsung 970 Evo Plus (NVMe) | Capacity: 250GB – 2TB Interface: PCIe 3.0 Speed: 3500/2500 MB/s Endurance: 1200 TBW | Check Price! |
 | Kingston A2000 (NVMe) | Capacity: 250GB – 1TB Interface: PCIe 3.0 Speed: 2200/2000 MB/s Endurance: 600 TBW | Check Price! |
Thanx for reading!
thank you sir
welcome
Mine machine has 2TB SATA HDD…I checked this using crucial scanner and they recommended me to use 2.5 inch SATA SSD…and I ordered 500gb BX crucial SATA SSD from Flipkart…
I want to know, can I freshly install windows on my SATA SSD? Then what will happen to my HDD partition? Windows install on C Drive…If I remove HDD and replace SSD..then what will happen to my C Drive?Can I use SSD in place of HDD and HDD in place of optical disk drive using caddy?
If you install new Windows on your new SATA SSD, you will have option to create new partitions as per your choice. Or you can go ahead without any partition as a single drive space. Alternatively, you can move the existing Windows to the new SATA drive and the same partitions will be created on your new drive if enough space is available. 2.5″ SATA Hard Drives and SATA SSDs have same form factor. So, you can switch them easily between the existing space and 2.5″ caddy. If you have other questions, get in touch with me.
Does idea pad 330 nvme ssd 500 gb support
Yes, but only upto 256GB.