
Got SSD? Great, it’s time to boost up the OS speed. In this article, you will find the relevant steps to install a compatible SSD in a Dell Inspiron 15 3581 Laptop. The installation process is quite simple, investing a few minutes reading the article will help you to get it fixed.
There are three different choices for you to upgrade the Dell Inspiron 15 3581 Laptop.
- The first choice is to replace the Hard Disk Drive with a SATA 2.5’’ SSD.
- The second choice is to add an M.2 SATA SSD “Additional SSD slot is included” in the Dell 3581 Laptop.
- The third choice is to replace the old HDD with SATA SSD, and also include an additional M.2 SATA SSD.
It’s your choice to upgrade, your Dell Inspiron 15 3581 Laptop.
Keep reading the article to explore the relevant steps for installing SSD in Dell 3581 laptops. The steps will help you with all the above-stated 3 choices.
Once, we’re done with the installation process “I’ll guide you – How to move your existing OS to your new SSD?”
Steps to Install an SSD in your Dell Inspiron 15 3581
Well, before implementing any of the stated steps, I would request you to get a compatible Screwdriver along with the new SSD. Don’t mess up with laptop screws using incompatible screwdrivers, it will be a hassle later on.
In case, if you don’t have a compatible screwdriver kindly, borrow it from a friend or neighbor “If any” Or Else you can get it from Amazon. It’s a small investment, which can be used for multiple purposes.
Check this Mini Screw Driver Kit.
NOTE: Make sure you have a backup for all your valuable DATA, have a copy in an external drive or cloud storage. Moreover, you can make use of reliable Backup Software to save Data.
Step 1: Unscrew the screws from Bottom Panel

Firstly, turn off your laptop and place it on a smooth surface. Flip it, you will find several screws tightened with the back panel. You have to unscrew all the screws, using a compatible screwdriver.
Note: Drop all the screws in the appropriate place “Make use of small box or bowl”
Step 2: Remove the DVD Drive

Once you are done with external screws kindly, remove the DVD Drive.
Step 3: Unscrew the hidden DVD Drive screws

As you can see in the above image, you will find 2 hidden screws. Make sure to unscrew those hidden screws to proceed further,
Step 4: Smoothly remove the bottom panel (Use a slim clip or prying tool)

Open your Dell Laptop and try to remove the bottom panel. Make use of a slim clip or similar instrument and gently remove the panel. Have a look at the above image, for a better understanding.
Note: Don’t give a hard try (roughly pulling) to remove the bottom panel, gently dismantle it.
Step 5: Unplug the connecting cable from battery

After removing the bottom panel, clean the inner surface “Dust Particles” that exists in the motherboard using a smooth brush. Do not mislead with any of the connecting cables or wires. Once done, gently remove the connecting cable of the battery.
Step 6: SSD Installation Process
Step 6.1: Installation of SATA 2.5″ SSD

Unscrew the four screws (HDD) and drop them at an appropriate place. In case, if you’re intending to replace the Hard Disk Drive with SATA 2.5’’ SSD kindly, the process is as follows.

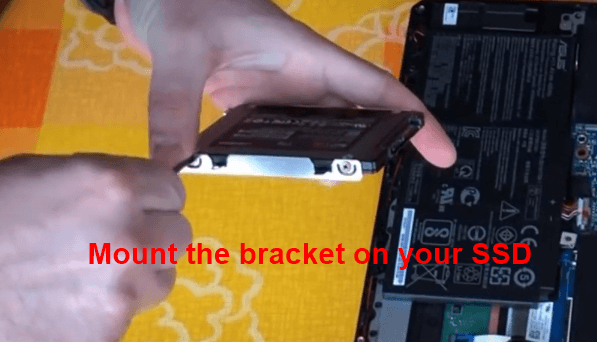
Once done, remove the connecting cable from HDD. Have a look at the above image for a better understanding. Now, what you have to do is just simply, connect the SATA 2.5” SSD with the Connecting cable. Place it, properly and tighten those 4 screws.
In case, if you feel unconfident “Watch the above video” Believe me, it’s not a difficult task to install SSD in Dell 15 3581 Laptop.
Step 6.2: Installation of M.2 SSD
Intending to add M.2 SATA SSD in Dell 15 3581 Laptop? Well, follow the step to get it done. You will find an M.2 SATA SSD slot, just beside the battery. Have a look at the above image for a better understanding.

What you have to do is, simply insert the SSD in the given slot but before that make sure to unscrew the screw.

Step 8: Adjust the newly inserted SSD and tighten it with screw
After inserting the M.2 SATA SSD in the given SSD slot, gently push it to adjust.
Now, bring back the screw and tighten the M.2 SSD in the motherboard. Make sure to fix it properly.
Step 9: Place the bottom panel back and tighten the screws
The final step to complete the SSD installation process in Dell 15 3581 Laptop, is to set back the bottom panel and tighten all the removed screws.
Step 10: Mount your SSD
Once done, Turn ON your laptop and proceed further with the below-stated steps “Mount your SSD” You have to implement the given steps to find the newly inserted SSD.
- Press Windows key + R simultaneously to open the Run dialog
- Input diskmgmt.msc and hit enter

- Inside the disk management menu, locate your newly installed SSD
- As you can see in the above image, you will find an option “Unallocated”

- Kindly, right-click on “Unallocated” and click on the New Simple Volume option and proceed further. You can create disk partitions from the same menu.
That’s it! You have completed the installation process.
How to move your existing OS to your new SSD?
Now, let’s understand the method to move the existing Operating System to the newly installed SSD.
Move existing OS to new installed M.2 SATA SSD.
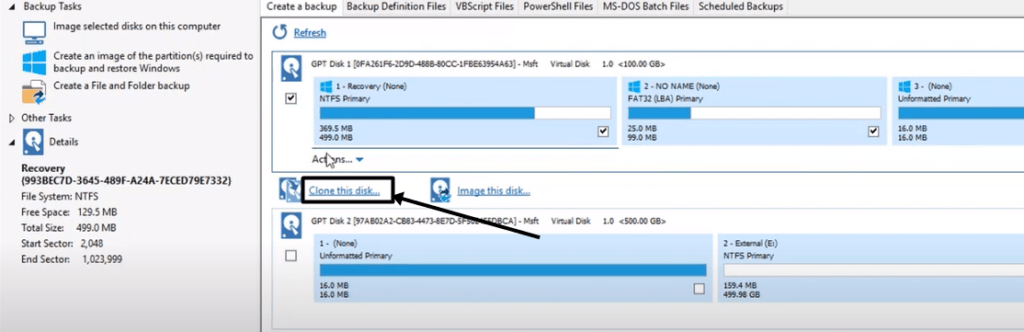
The process is quite simple if, you have added an M.2 SATA SSD and kept the old Hard Drive Disk for storage purposes. Firstly, download Macrium Reflect Software, install the same on your Dell laptop. Once done, launch the Macrium Reflect Software, you will find OS Drive and Stored files.
Now, give a checkmark on OS and other important files. You will find the “Clone this Disk” option kindly, click on it and select the Storage “M.2 SATA SSD”. The process will consume some time, wait till it gets completed. Once done, close the current tabs and restart your Dell Inspiron 15 3581 Laptop. That’s it.
Move existing OS to SATA 2.5” SSD from HDD
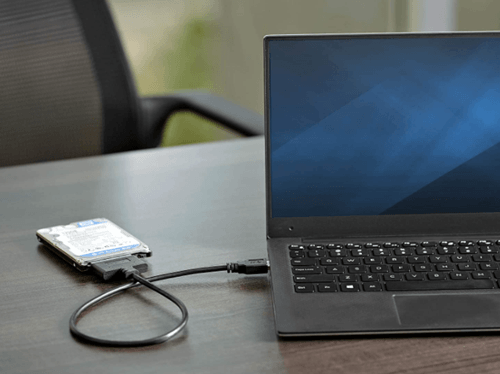
In case, if you have replaced the HDD with SATA 2.5’’ SSD then you must have a SATA to USB Wire to execute the process. Don’t, have it? Well, you can get it online
Check this SATA to USB Wire for sure.
Follow the stated steps to move the existing OS to the newly installed SATA 2.5” SSD from the old Hard Disk Drive.
- Firstly, Plug-in your Hard Disk Drive using the SATA to USB cable
- Now, turn OFF/ON your laptop and enter into BIOS Mode (Press a special key ESC or F11 while System is booting)
- Click on System Configuration Menu and change the Boot Priority Drive to your Hard Drive which is connected through the USB.
- You System will boot up from the old Hard Disk Drive.
- Now, download and install Macrium Reflect Software on your Dell Inspiron 15 3581 Laptop.
- Once done, launch the Macrium Reflect software and give a checkmark on OS and other useful files.
- The Next step is to click on the “Clone this Disk” option and select the storage SATA 2.5” SSD.
- The Process will consume some time kindly, wait till it gets completed.
- Now, close all the tabs and turn OFF/ON your Laptop to enter in BIOS Mode.
- Again, you have to click on System Configuration Menu and change the Boot Priority Drive “SATA 2.5” SSD”
- Save the setting and boot up your System.
That’s it you have successfully, moved the existing OS from an old HDD to a newly installed SSD.
In case, if you feel unconfident kindly, watch the above video for a better understanding. The process is not difficult, you just have to follow the stated steps to get it done.
Conclusion
For sure, once you go through the whole article, you will be aware of how to install SSD in Dell Inspiron 15 3581 Laptop and move the existing OS to a newly installed SSD. I have covered all the necessary points in simple and understandable steps.
I hope you enjoyed the article. If you have any doubts do let me know in the comment section, I’ll look into it.