
This tutorial is going to work for multiple models of Lenovo Ideapad 3 and Ideapad Slim 3. The list of all those models is as follows.
- IdeaPad 3 (14″, 05)
- IdeaPad 3 (15″, 05)
- IdeaPad 3 (17″, 05)
- IdeaPad Slim 3 (14″, 05)
- IdeaPad Slim 3 (15″, 05)
- IdeaPad Slim 3 (17″, 05)
- Ideapad Gaming 3
If we talk about the different storage configurations in these laptops, you will see these three cases.
- 128GB PCIe NVMe SSD M.2
- 256GB PCIe NVMe SSD M.2
- Up to 1TB HDD SATA, 5400rpm
- Up to 256GB SSD + 1TB HDD dual storage
The low-end variants of Ideapad 3 and Slim 3 are going to have a small-sized NVMe or a hard disk for storage purposes. But, the Ideapad Gaming 3 can have big-sized storage as well.
But, you always have some possibilities for an upgrade. You can either choose a new hard disk to increase the storage space or a faster NVMe SSD to enhance the performance of your laptop.
A SATA 2.5″ SSD upgrade is always possible because a SATA 2.5″ port will be available regardless of the overall features and the price of your laptop. But, confusion arises when you want to install an NVMe M.2 SSD. Find your Lenovo laptop’s user manual and specifications here.
The selection of your SSD will be totally dependent on the specifications of your laptop. So, make sure to check this SSD compatibility guide before you go further. This guide will help you know about the available ports on your laptop if you are not aware of them. Now, without any further delay’s let’s see the steps to upgrade your Ideapad 3 SSD.
Which SSD is suitable for Lenovo Ideapad 3?
Again, you will have to check the specifications of your laptop. In the cheaper and low-end variants of Ideapad 3 and Ideapad Slim 3, you may not get any M.2 slot at all. So, in that case, it is not worth buying an NVMe SSD. So, it is crucial to check the port availability before you proceed with any SSD out there.
If we talk about the most popular variant i.e. Intel Core i3-1005G1-8GB, it comes with a 256 GB 2240 NVMe SSD. You can say all the higher-CPU variants will at least an empty M.2 port if not occupied. But, it is wise to check them before you proceed. But, again, upgrading to a SATA-3 2.5″ 600MB/s SSD is possible in all versions of this laptop.
For the selection of a good NVMe, you can always go for SSDs like Samsung 970 Evo Plus, WD Blue SN570, or Kingston A2000. In the SATA 2.5″ category, WD Blue, Samsung 870 EVO, and Crucial MX500 are the top players. Buying a DRAM SSD is always recommended. I will give you my SSD recommendations by the end of this article.
Steps to install/upgrade SSD in Lenovo Ideapad 3 laptop
The installation of any SSD in the Lenovo Ideapad 3 is fairly easy once you open up the bottom cover. So, we are going to do everything step by step.
Required Tools:
- Screwdriver (Phillips head) (PH1/PH01)
- Plastic Pry Tool (Strong Guitar Plectrum will also work)
- Anti-Static Wrist strap (Not Mendatory)
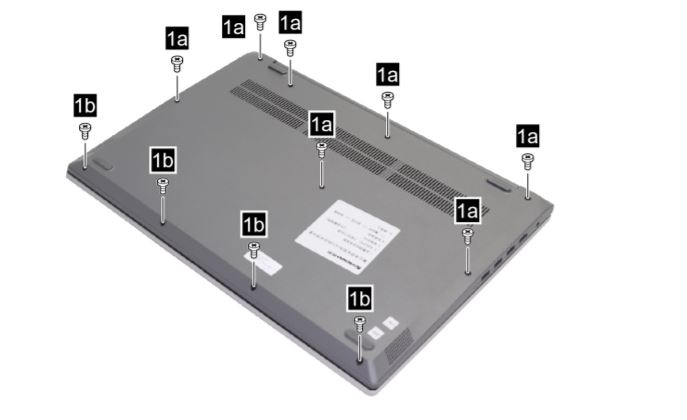
Step 1: Open the Bottom Panel
Make sure to remove the power cord before proceeding. Not, turn your laptop over and open the 10 screws given in the bottom side. You will find six M2.5×7 screws and four M2.5×4 screws on the bottom. Once the screws are opened, you will have to pry the latches from all sides. Take a pry tool and insert from one side between the laptop body and bottom panel. You can then move the pry tool around the laptop to remove all those plastic latches. Once, all the plastic clips or latches are freed up, you can take the bottom panel out easily.

Step 2: Unplug the Battery connector
For this, you just have to use your fingernails or any thin tool. Just take the connector out from the port. A little bit of pressure and the connector will be out. See image for reference.

Once the laptop is free from any sort of power, you can start doing your installation works.
Step 3: Install the SSD
Now, as we discussed before, you can choose between an M.2 or SATA 2.5″ SSD. We are going to cover both the things. So, first of all, let’s start with the M.2 NVMe installation.
M.2 SSD Installation/Upgrade in Ideapad 3
If your laptop is already having an SSD, you will normally see a 2240 Form Factor NVMe on it. It will look like this.
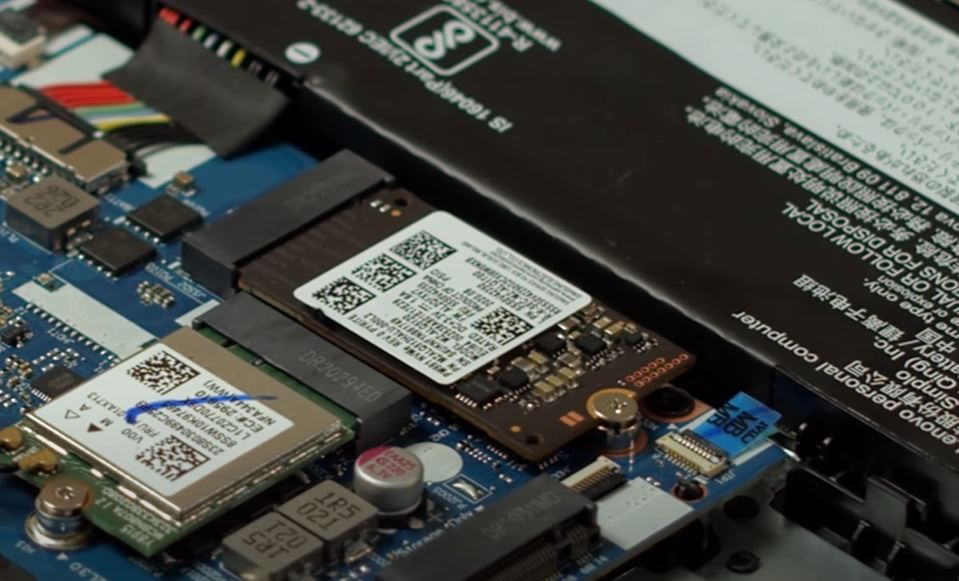
You can either replace it with a newer NVMe SSD or if this slot is free. You don’t have to stick to the 2240 Form-Factor NVMe, you can also buy the bigger and the most popular form factor i.e. 2280. So, the process of installation is as follows.
*2240/Form-Factor actually indicates the physical size of the SSD.
If you have a 2240 Form Factor NVMe SSD, no need to do anything more. Just remove the existing one and install a new one. But, mostly, you will find the NVMes in 2280 form factor only. So, you will have to remove the M.2 standoff as well.
*Standoff is a small screw holder for your M.2 SSD screw.
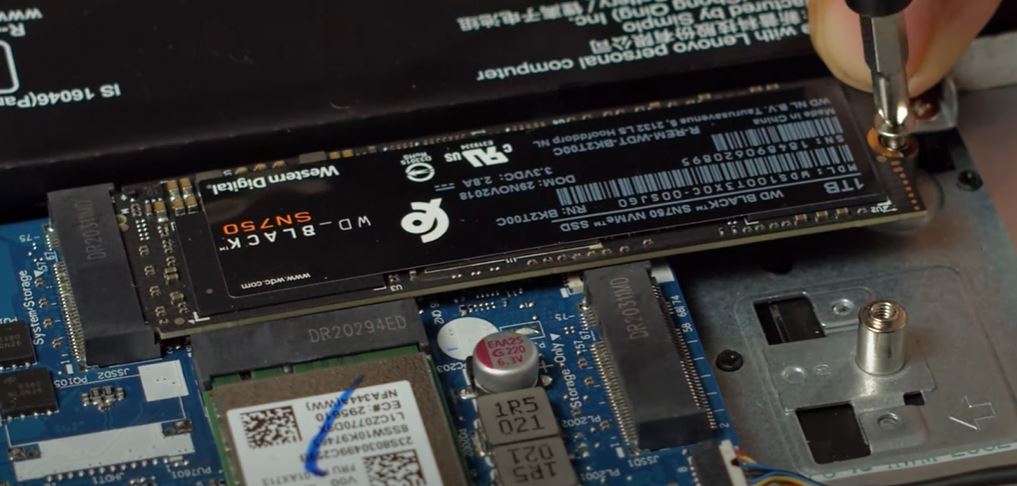
- Remove the standoff using a square-header screwdriver
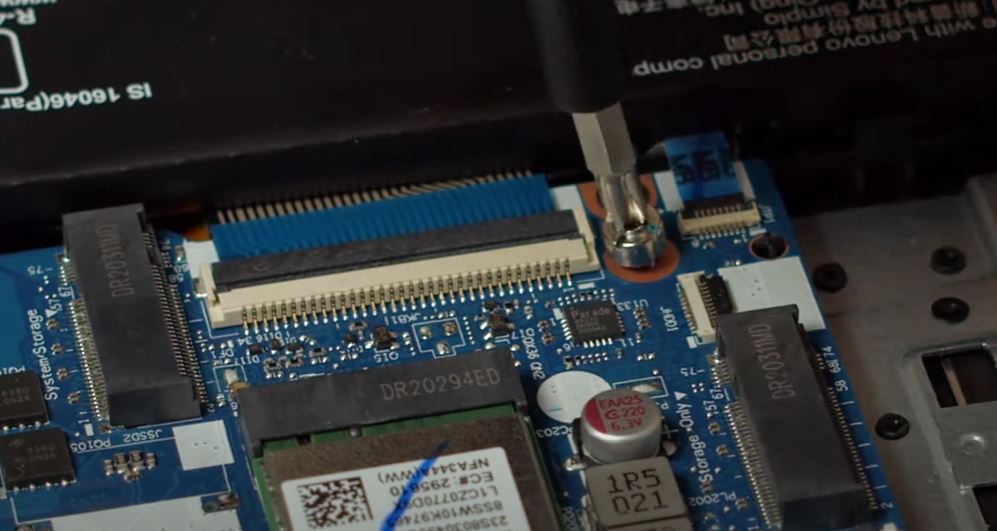
- Now, insert your new M.2 NVMe SSD inside the port at an angle. Then press the SSD and tighten the M.2 screw properly.
Now, you are done with the NVMe M.2 SSD installation. If you want to replace or add a new SATA SSD, below is the procedure for you.
SATA 2.5″ SSD Installation
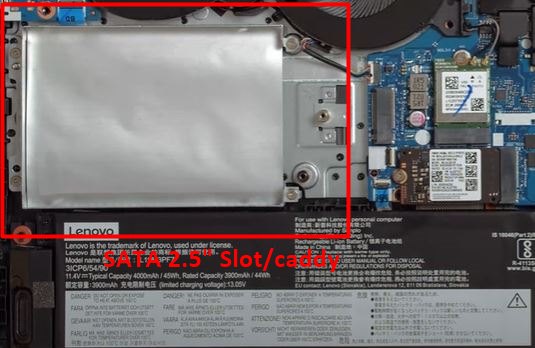
In order to install a SATA 2.5″ SSD, you will again have to check if there is already an HDD or SSD installed at the slot. An empty SATA 2.5″ caddy or port looks like this.
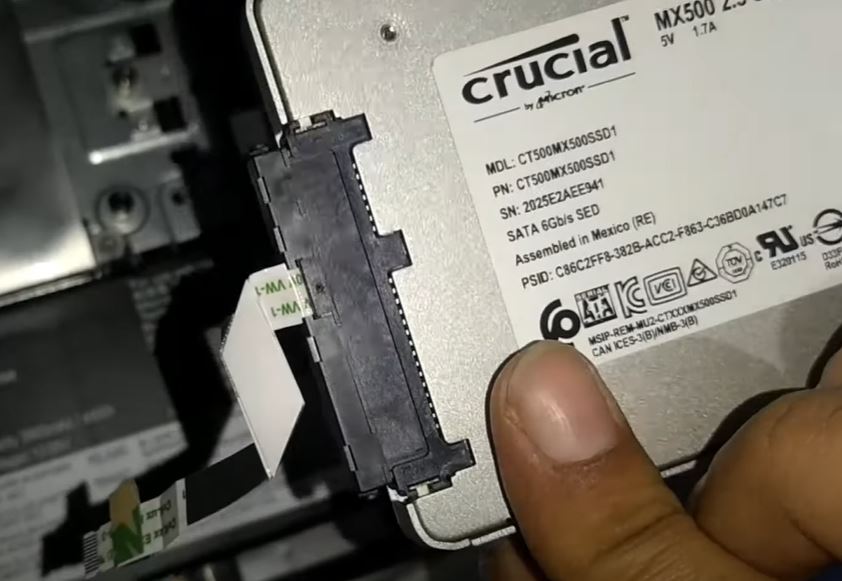
- In order to install your SSD inside this port, you will need to have a SATA connector cable (you get it inside your laptop box). If you don’t have one, you can buy one from here. Just take that connector and insert it inside the SSD port.
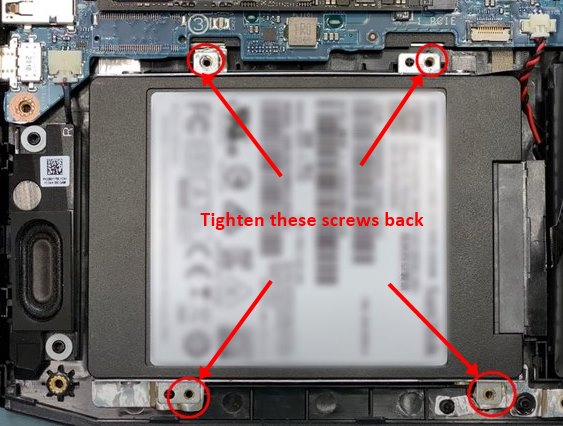
- Take that caddy out by removing the four screws. Then place your SSD inside it and tighten it using the four screws (you would have get the screws in your laptop’s box). If not, buy them here. Then, just tighten your SSD on that caddy and install it back on the port.
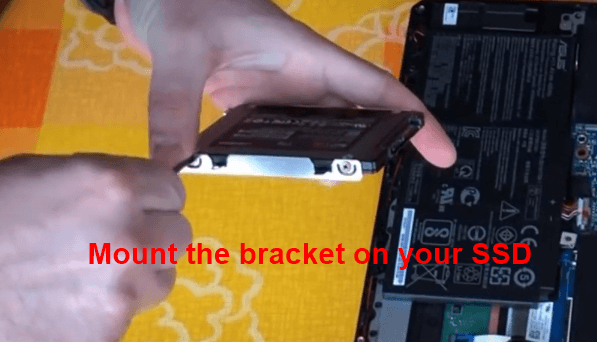
Your 2.5″ SATA SSD should look like this now.
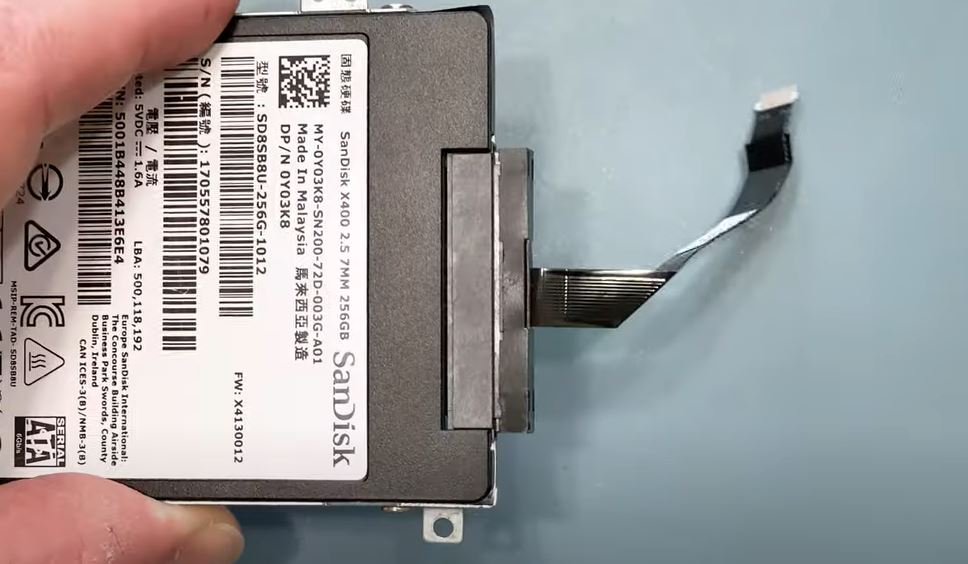
- Now, you can place it on its location and tighten those four screws.
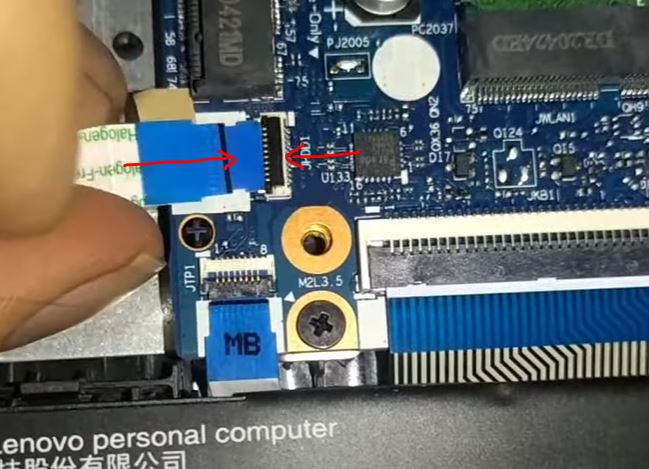
- The second end of that SATA strip cable will be connected to your laptop’s SATA connector port. You just open its cover and then place the strip inside. Then, close that cover with a little pressure on it.
You are done with the installation of your SATA 2.5″ SSD as well. You may need to mount your SSD if it doesn’t show up in the File manager.
Step 4: Reconnect the battery connector and close the bottom lid
Make sure to reconnect the battery connector and then place your bottom cover. Tighten the screws and that’s it.
How to install or migrate OS?
If your OS was already inside the faster NVMe SSD and you just installed a SATA SSD, you don’t need to move the OS. But, if the laptop was using a slower SSD or HDD and you have now upgraded to a faster NVMe, you can use Macrium Reflect software to move your OS to the new drive for free.
You can also install a new OS for the best results in terms of speed and performance.
Best SSDs for Lenovo Ideapad 3 Laptop
| Image | Model | Features and Specs | Price |
|---|---|---|---|
 | Samsung 870 Evo (SATA) | Capacity: 250GB – 4TB Interface: SATA Speed: 550/510 MB/s Endurance: 2,400 TBW | Check Price |
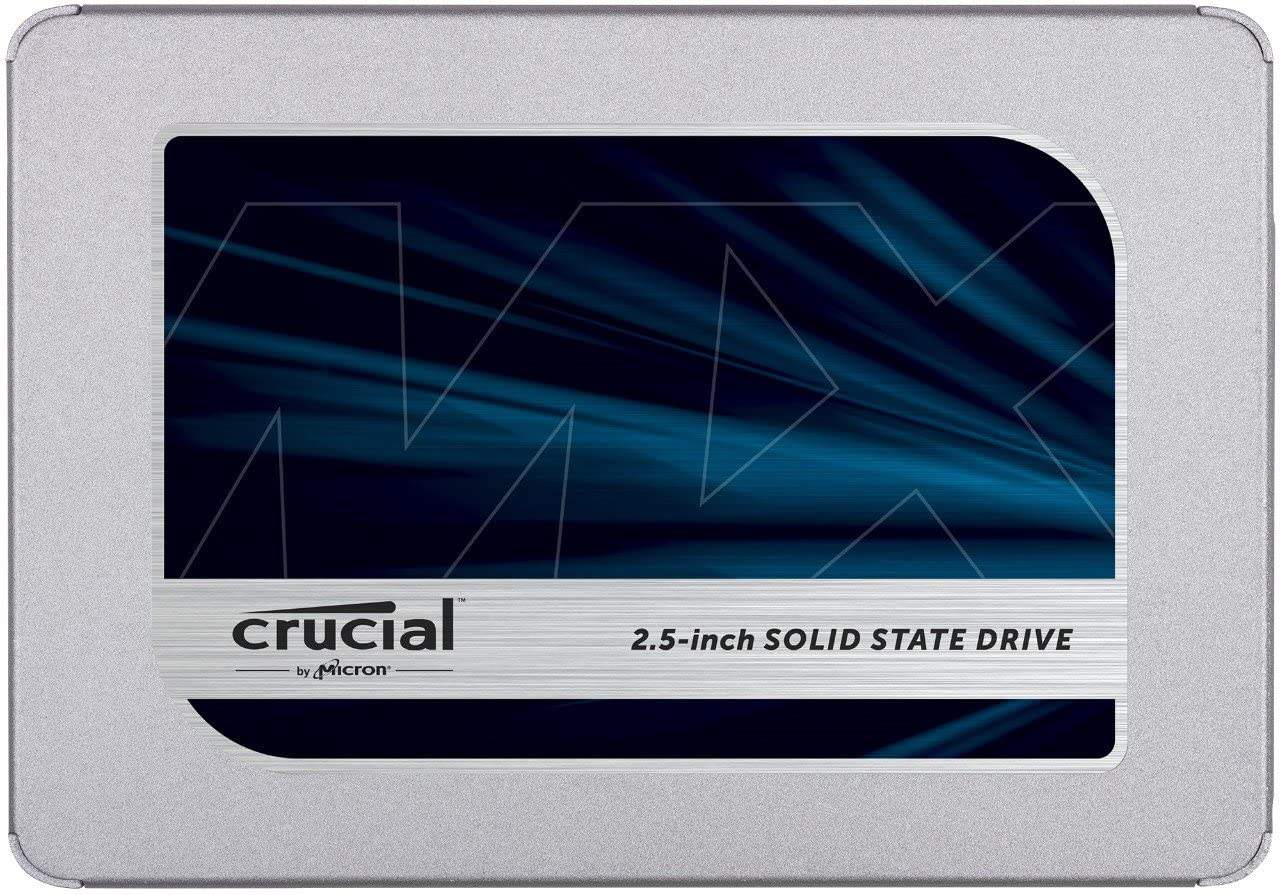 | Crucial MX500 (SATA) | Capacity: 250GB – 4TB Interface: SATA Speed: 560/530 MB/s Endurance: Up to 700 TBW | Check Price |
 | Samsung 970 Evo Plus (NVMe) | Capacity: 250GB – 2TB Interface: PCIe 3.0 Speed: 3500/2500 MB/s Endurance: 1200 TBW | Check Price! |
 | Kingston A2000 (NVMe) | Capacity: 250GB – 1TB Interface: PCIe 3.0 Speed: 2200/2000 MB/s Endurance: 600 TBW | Check Price! |
Thanks for reading